
Layers of chocolate ganache, coffee buttercream and coffee syrup soaked almond cake, topped with a glossy layer of chocolate glaze. I fell in love with this cake the first time I tasted it. This is my effort to reproduce it.

For a proper professional finish, it would be topped with its name ‘Opera’ piped on in chocolate glaze in cursive script, or maybe have a bit of edible gold leaf artistically placed on it – I have gone for simplicity (and ease) here. Also, if you really want to go the extra mile and have a croustillant chocolate base made using paillette feuilletine, see this site: https://www.homecookingadventure.com/recipes/opera-cake
There are a lot of elements, and it does take time, but the preparation of the cake can easily be spread over a few days. I’ll present the components in a logical order.
This will make a cake about 7 inches (18 cm) square(ish). It is very rich, so you should get about 12 portions out of it.
The different stages are:
- Almond sponge cake
- Coffee syrup
- Chocolate ganache
- Coffee buttercream
- Chocolate glaze
The ingredients you will need for each stage are:
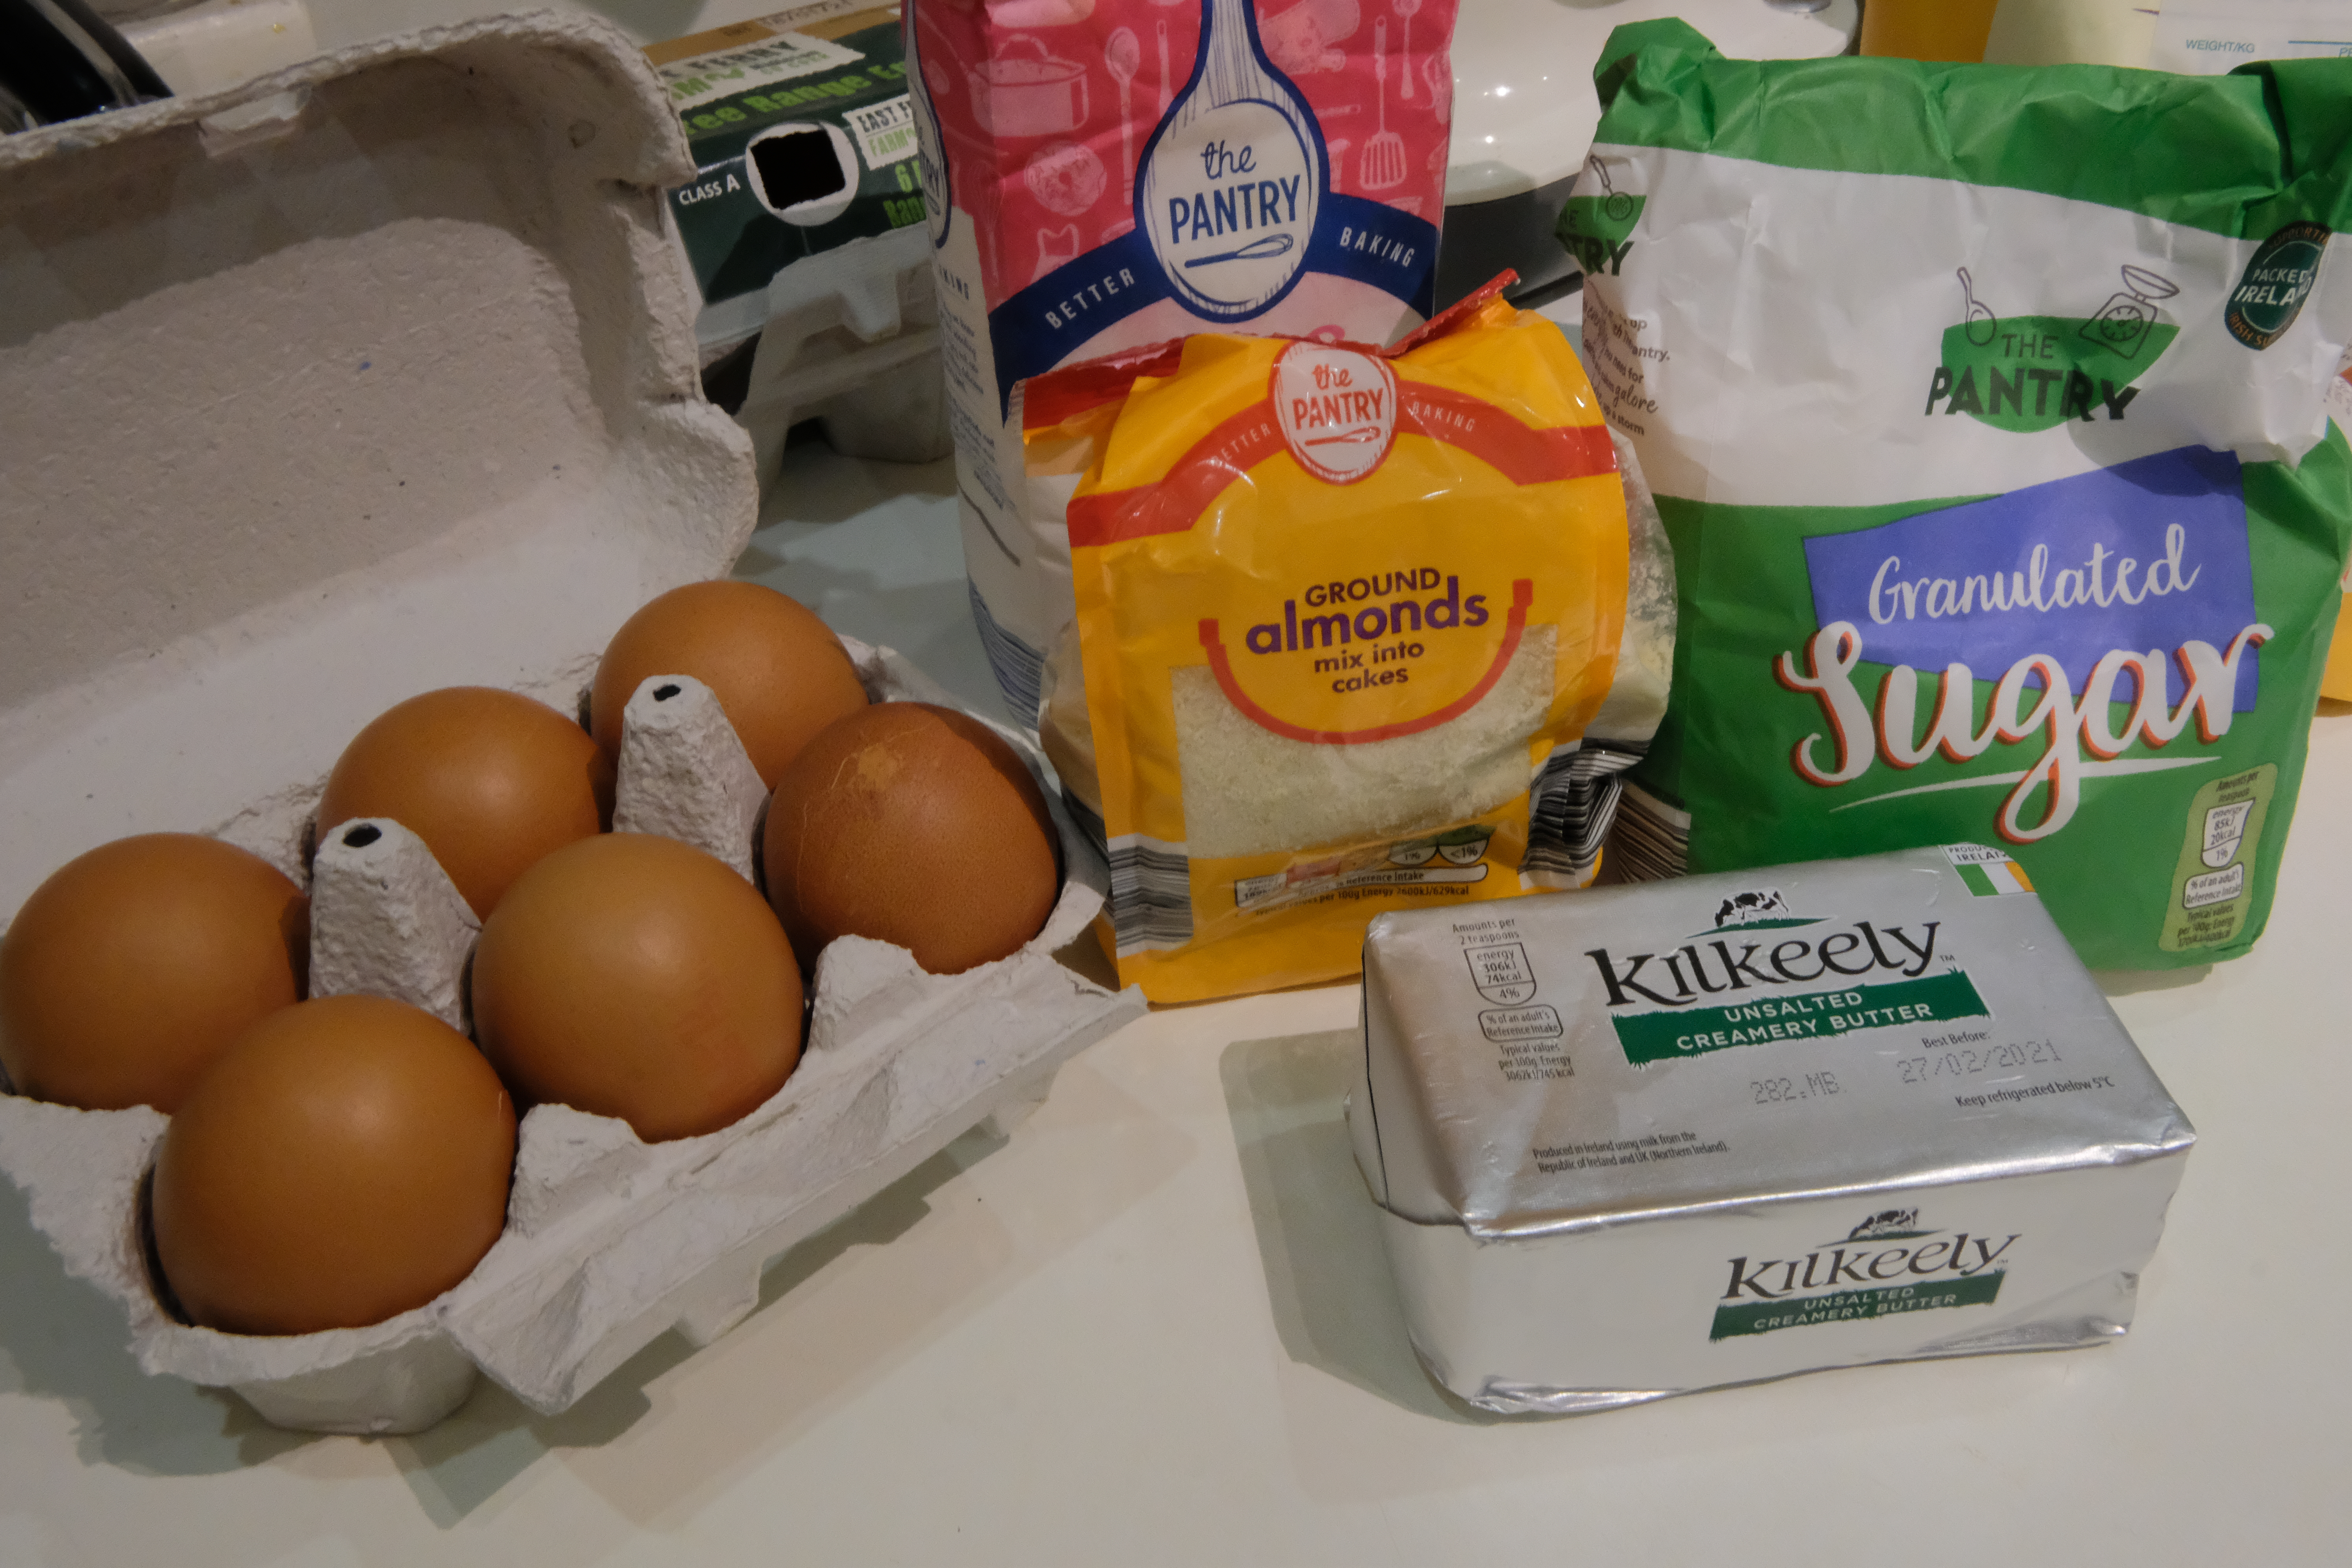
Almond sponge cake
- 3 eggs, room temperature
- 3 oz (85 g) ground almonds (almond flour)
- 3 oz (85 g) icing sugar (powdered sugar)
- 1 oz (28 g) plain flour
- 1 oz (28 g) butter, melted
- 3 egg whites (you will use the yolks in the buttercream)
- 1 oz (28 g) granulated sugar
Coffee syrup
- 2/3 cup (160 ml) water
- 1/2 cup (100 g) granulated sugar
- 3 tsp (6 g) instant coffee
Chocolate ganache
- 5.5 oz (160 g) semisweet chocolate (70-80% cacao)
- 2/3 cup (160 ml) whipping cream
Coffee buttercream
- 3 egg yolks
- 5 oz (135 g) granulated sugar
- 3 tblsp (45 ml) water
- 2 tsp (4 g) instant coffee
- 8 oz (227 g) unsalted butter
Chocolate glaze
- 3 oz (85 g) unsalted butter
- 7 oz (200 g) semisweet chocolate (70-80% cacao)
Equipment:
- Oven preheated to 200C / 390 F (170C / 340F fan oven)
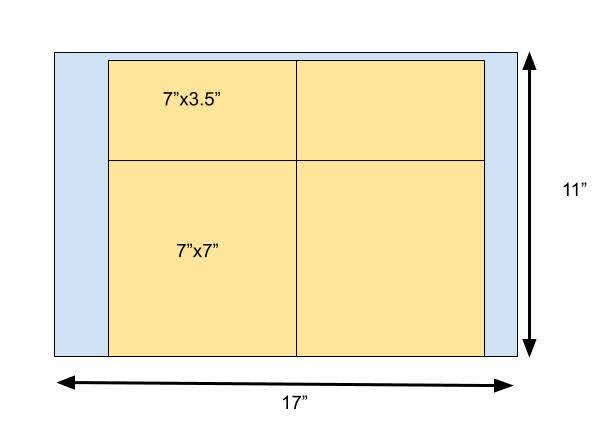
- 17″ x 11″ (43 cm x 28 cm) shallow cake tin, greased and lined with parchment paper
- Offset palette knife (makes spreading the fillings much easier)
- Mixer
- Bain marie (double boiler)
- Small saucepan
- Sugar thermometer
- Pastry brush
Method:
Day 1: prepare the sponge and the coffee syrup
Sponge
- Sift the ground almonds and icing sugar into a large bowl – if you are using a stand mixer, sift them into the bowl of the stand mixer. Add the 3 whole eggs and mix until creamy and fluffy. Then add the sifted flour and mix it in.
- In a large metal or ceramic bowl, beat the egg whites until foamy. Gradually add the sugar and continue beating until the egg whites form stiff peaks.
- Fold the egg whites into the almond mixture and add the melted butter (you can use the slowest speed on the stand mixer for this).
- Spread the mixture into the prepared cake tin and place in the preheated oven. Bake for 10-12 minutes (light golden in colour and just springy to touch).
- Turn cake onto a sheet of baking parchment on a cooling rack. Carefully peel off the layer of parchment the cake cooked in. Leave the cake to cool completely.
- When the cake is cool, cut it into 2 squares approximately 8″ x 7″ and two strips approximately 7″ x 4″ (remember you will be trimming the cake, so the more you can leave on now, the bigger your finished cake will be. The diagram shows dimensions for a square cake, rather than slightly rectangular).

If you are preparing the cake over several days, place the cut cake in an airtight container with the layers separated by parchment.
Coffee syrup
- Place the water, coffee and sugar into a small saucepan and bring to the boil over a medium heat. Leave to cool.
If you are preparing the cake over several days, pour the syrup into a jar or other container and cover.

Day 2: prepare the chocolate ganache and coffee buttercream and start assembling the cake
Chocolate ganache
- Break up the chocolate into small pieces and place in a bowl.
- Heat the cream in a saucepan until it is just coming to the boil.
- Add the broken chocolate to the cream and leave to rest for a minute. Stir until the chocolate has completely melted into the cream and the mix is smooth and shiny. Leave to cool fully.
- I like a whipped ganache, so when it is fully cooled, you can beat it in the stand mixer until it is fluffy. This is optional and a matter of preference.
*If, by any chance, your ganache ‘splits’ and becomes an oily mess, don’t despair. There are a number of ways to recover it: you will easily find these online. See for example this site: https://www.finecooking.com/article/science-chocolate-ganache
Coffee buttercream
- Mix the yolks in a heatproof bowl (eg the bowl of your stand mixer) until they are creamy and pale yellow in colour.
- Place the sugar, water and coffee in a small saucepan and bring to the boil over a medium heat. Using the sugar thermometer, keep it boiling until it reaches 235-240 F.
- Remove it from the heat and pour it gradually over the egg mixture, while mixing constantly on a low speed. BE CAREFUL – SUGAR SYRUP CAN BURN YOU.
- When all the sugar syrup is added, continue mixing at a medium speed until the mixture has cooled to room temperature.
- Gradually add the softened butter (I usually cut it into cubes about 1 cm square) while mixing at a low speed. When all the butter has been incorporated, mix on a high speed until the mixture is smooth and fluffy.
*If your buttercream splits, that can be fixed too! The key is to make sure the egg/syrup mixture is cool enough before adding the butter. See this site for more information: https://www.leaf.tv/articles/how-to-fix-separated-buttercream-frosting/
First stage assembly
- Brush one of the squares of cake with coffee syrup. The cake should be quite moist, so use about a third of the syrup.
- Spread half of the coffee butter cream on this square and level off using the palette knife.
- Place the two strips of cake on top of this and brush with coffee syrup.
- Spread the chocolate ganache on top of the two strips and level off using the palette knife.
- Place the second square on top of the ganache and brush with the remaining coffee syrup.
- Spread the remaining coffee buttercream on top of this and level off using the palette knife.
- Leave the cake in the fridge for at least 2 hours, or overnight. The buttercream needs to be well chilled for the final stage.
Don’t worry about keeping the edges too tidy as you will be trimming the edges after topping the cake with the chocolate glaze. And the trimmings are delicious!

Day 3: Chocolate glaze and final assembly
Chocolate glaze
- Break the chocolate into small pieces and set aside about 2 oz. Melt the butter and remaining chocolate in a double boiler or bain Marie over barely simmering water. Stir it gently until it appears smooth.
- Remove it from the heat and stir in the remaining chocolate until the glaze is smooth. Leave it to cool until it is room temperature but still liquid.
- Pour the glaze over the chilled cake. It will set rapidly, so pour quite quickly and tilt the cake to get an even spread. If you are ambitious, keep aside a bit of glaze.
- Leave the cake for a couple of hours until the glaze has set.

Final assembly
- Trim the edges using a hot knife.
- If you are ambitious, warm the remaining glaze to a piping consistency, and using a small plastic bag with the corner snipped off, or an icing bag and fine nozzle, pipe the word ‘Opera’ on the cake in decorative script.
- If you have any edible gold leaf, decorate the cake with this.
- Serve the cake in rectangles, cut with a sharp knife.

It is worth noting that this cake can be frozen in individual slices and will keep very well.

