Opera cake- French decadence

Layers of chocolate ganache, coffee buttercream and coffee syrup soaked almond cake, topped with a glossy layer of chocolate glaze. I fell in love with this cake the first time I tasted it. This is my effort to reproduce it.

For a proper professional finish, it would be topped with its name ‘Opera’ piped on in chocolate glaze in cursive script, or maybe have a bit of edible gold leaf artistically placed on it – I have gone for simplicity (and ease) here. Also, if you really want to go the extra mile and have a croustillant chocolate base made using paillette feuilletine, see this site: https://www.homecookingadventure.com/recipes/opera-cake

There are a lot of elements, and it does take time, but the preparation of the cake can easily be spread over a few days. I’ll present the components in a logical order.

This will make a cake about 7 inches (18 cm) square(ish). It is very rich, so you should get about 12 portions out of it.

The different stages are:

  • Almond sponge cake
  • Coffee syrup
  • Chocolate ganache
  • Coffee buttercream
  • Chocolate glaze

The ingredients you will need for each stage are:

Almond sponge cake

  • 3 eggs, room temperature
  • 3 oz (85 g) ground almonds (almond flour)
  • 3 oz (85 g) icing sugar (powdered sugar)
  • 1 oz (28 g) plain flour
  • 1 oz (28 g) butter, melted
  • 3 egg whites (you will use the yolks in the buttercream)
  • 1 oz (28 g) granulated sugar

Coffee syrup

  • 2/3 cup (160 ml) water
  • 1/2 cup (100 g) granulated sugar
  • 3 tsp (6 g) instant coffee

Chocolate ganache

  • 5.5 oz (160 g) semisweet chocolate (70-80% cacao)
  • 2/3 cup (160 ml) whipping cream

Coffee buttercream

  • 3 egg yolks
  • 5 oz (135 g) granulated sugar
  • 3 tblsp (45 ml) water
  • 2 tsp (4 g) instant coffee
  • 8 oz (227 g) unsalted butter

Chocolate glaze

  • 3 oz (85 g) unsalted butter
  • 7 oz (200 g) semisweet chocolate (70-80% cacao)

Equipment:

  • Oven preheated to 200C / 390 F (170C / 340F fan oven)
  • 17″ x 11″ (43 cm x 28 cm) shallow cake tin, greased and lined with parchment paper
  • Offset palette knife (makes spreading the fillings much easier)
  • Mixer
  • Bain marie (double boiler)
  • Small saucepan
  • Sugar thermometer
  • Pastry brush
Approximate dimensions for cutting the cake – it will depend if you want a perfect square, or as much cake as possible!

Method:

Day 1: prepare the sponge and the coffee syrup

Sponge

  1. Sift the ground almonds and icing sugar into a large bowl – if you are using a stand mixer, sift them into the bowl of the stand mixer. Add the 3 whole eggs and mix until creamy and fluffy. Then add the sifted flour and mix it in.
  2. In a large metal or ceramic bowl, beat the egg whites until foamy. Gradually add the sugar and continue beating until the egg whites form stiff peaks.
  3. Fold the egg whites into the almond mixture and add the melted butter (you can use the slowest speed on the stand mixer for this).
  4. Spread the mixture into the prepared cake tin and place in the preheated oven. Bake for 10-12 minutes (light golden in colour and just springy to touch).
  5. Turn cake onto a sheet of baking parchment on a cooling rack. Carefully peel off the layer of parchment the cake cooked in. Leave the cake to cool completely.
  6. When the cake is cool, cut it into 2 squares approximately 8″ x 7″ and two strips approximately 7″ x 4″ (remember you will be trimming the cake, so the more you can leave on now, the bigger your finished cake will be. The diagram shows dimensions for a square cake, rather than slightly rectangular).

If you are preparing the cake over several days, place the cut cake in an airtight container with the layers separated by parchment.

Coffee syrup

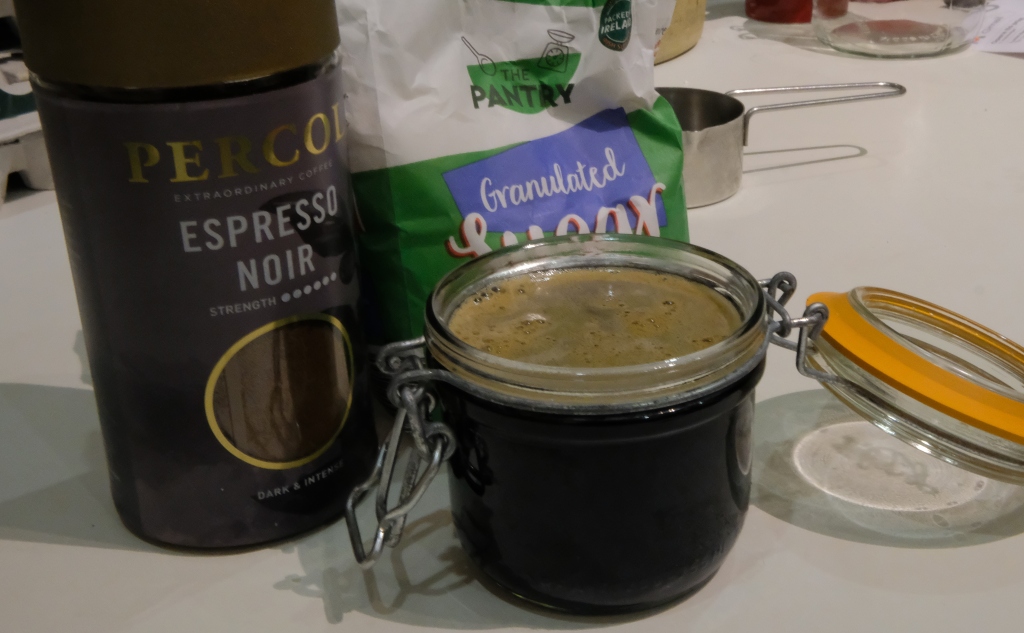
  1. Place the water, coffee and sugar into a small saucepan and bring to the boil over a medium heat. Leave to cool.

If you are preparing the cake over several days, pour the syrup into a jar or other container and cover.
Day 2: prepare the chocolate ganache and coffee buttercream and start assembling the cake

Chocolate ganache

  1. Break up the chocolate into small pieces and place in a bowl.
  2. Heat the cream in a saucepan until it is just coming to the boil.
  3. Add the broken chocolate to the cream and leave to rest for a minute. Stir until the chocolate has completely melted into the cream and the mix is smooth and shiny. Leave to cool fully.
  4. I like a whipped ganache, so when it is fully cooled, you can beat it in the stand mixer until it is fluffy. This is optional and a matter of preference.

*If, by any chance, your ganache ‘splits’ and becomes an oily mess, don’t despair. There are a number of ways to recover it: you will easily find these online. See for example this site: https://www.finecooking.com/article/science-chocolate-ganache

Coffee buttercream

  1. Mix the yolks in a heatproof bowl (eg the bowl of your stand mixer) until they are creamy and pale yellow in colour.
  2. Place the sugar, water and coffee in a small saucepan and bring to the boil over a medium heat. Using the sugar thermometer, keep it boiling until it reaches 235-240 F.
  3. Remove it from the heat and pour it gradually over the egg mixture, while mixing constantly on a low speed. BE CAREFUL – SUGAR SYRUP CAN BURN YOU.
  4. When all the sugar syrup is added, continue mixing at a medium speed until the mixture has cooled to room temperature.
  5. Gradually add the softened butter (I usually cut it into cubes about 1 cm square) while mixing at a low speed. When all the butter has been incorporated, mix on a high speed until the mixture is smooth and fluffy.

*If your buttercream splits, that can be fixed too! The key is to make sure the egg/syrup mixture is cool enough before adding the butter. See this site for more information: https://www.leaf.tv/articles/how-to-fix-separated-buttercream-frosting/

First stage assembly

  1. Brush one of the squares of cake with coffee syrup. The cake should be quite moist, so use about a third of the syrup.
  2. Spread half of the coffee butter cream on this square and level off using the palette knife.
  3. Place the two strips of cake on top of this and brush with coffee syrup.
  4. Spread the chocolate ganache on top of the two strips and level off using the palette knife.
  5. Place the second square on top of the ganache and brush with the remaining coffee syrup.
  6. Spread the remaining coffee buttercream on top of this and level off using the palette knife.
  7. Leave the cake in the fridge for at least 2 hours, or overnight. The buttercream needs to be well chilled for the final stage.

Don’t worry about keeping the edges too tidy as you will be trimming the edges after topping the cake with the chocolate glaze. And the trimmings are delicious!

Day 3: Chocolate glaze and final assembly

Chocolate glaze

  1. Break the chocolate into small pieces and set aside about 2 oz. Melt the butter and remaining chocolate in a double boiler or bain Marie over barely simmering water. Stir it gently until it appears smooth.
  2. Remove it from the heat and stir in the remaining chocolate until the glaze is smooth. Leave it to cool until it is room temperature but still liquid.
  3. Pour the glaze over the chilled cake. It will set rapidly, so pour quite quickly and tilt the cake to get an even spread. If you are ambitious, keep aside a bit of glaze.
  4. Leave the cake for a couple of hours until the glaze has set.

Final assembly

  1. Trim the edges using a hot knife.
  2. If you are ambitious, warm the remaining glaze to a piping consistency, and using a small plastic bag with the corner snipped off, or an icing bag and fine nozzle, pipe the word ‘Opera’ on the cake in decorative script.
  3. If you have any edible gold leaf, decorate the cake with this.
  4. Serve the cake in rectangles, cut with a sharp knife.

It is worth noting that this cake can be frozen in individual slices and will keep very well.

Bean Burrito

This is my go to dinner every Friday, as 3 weeks out of 4 it is just assembly. I gleaned the recipe from our favourite café in Dingle (long gone, alas), the Homely House (https://inphotos.org/2006/09/29/homely-house-brian-and-eaglespirit/), which was located in Dick Mack’s Courtyard. We used to go in every Saturday and have the burrito (served there with nacho chips and a black olive on top), and I was very happy when the chef, Brian, shared the recipe with me.

I usually make the full quantity of bean mix, use a quarter for 2 burritos, and freeze the rest in 3 tubs. This is handy for making two burritos at a time. 

Ingredients:-

Bean filling (quantity for 8 burritos):

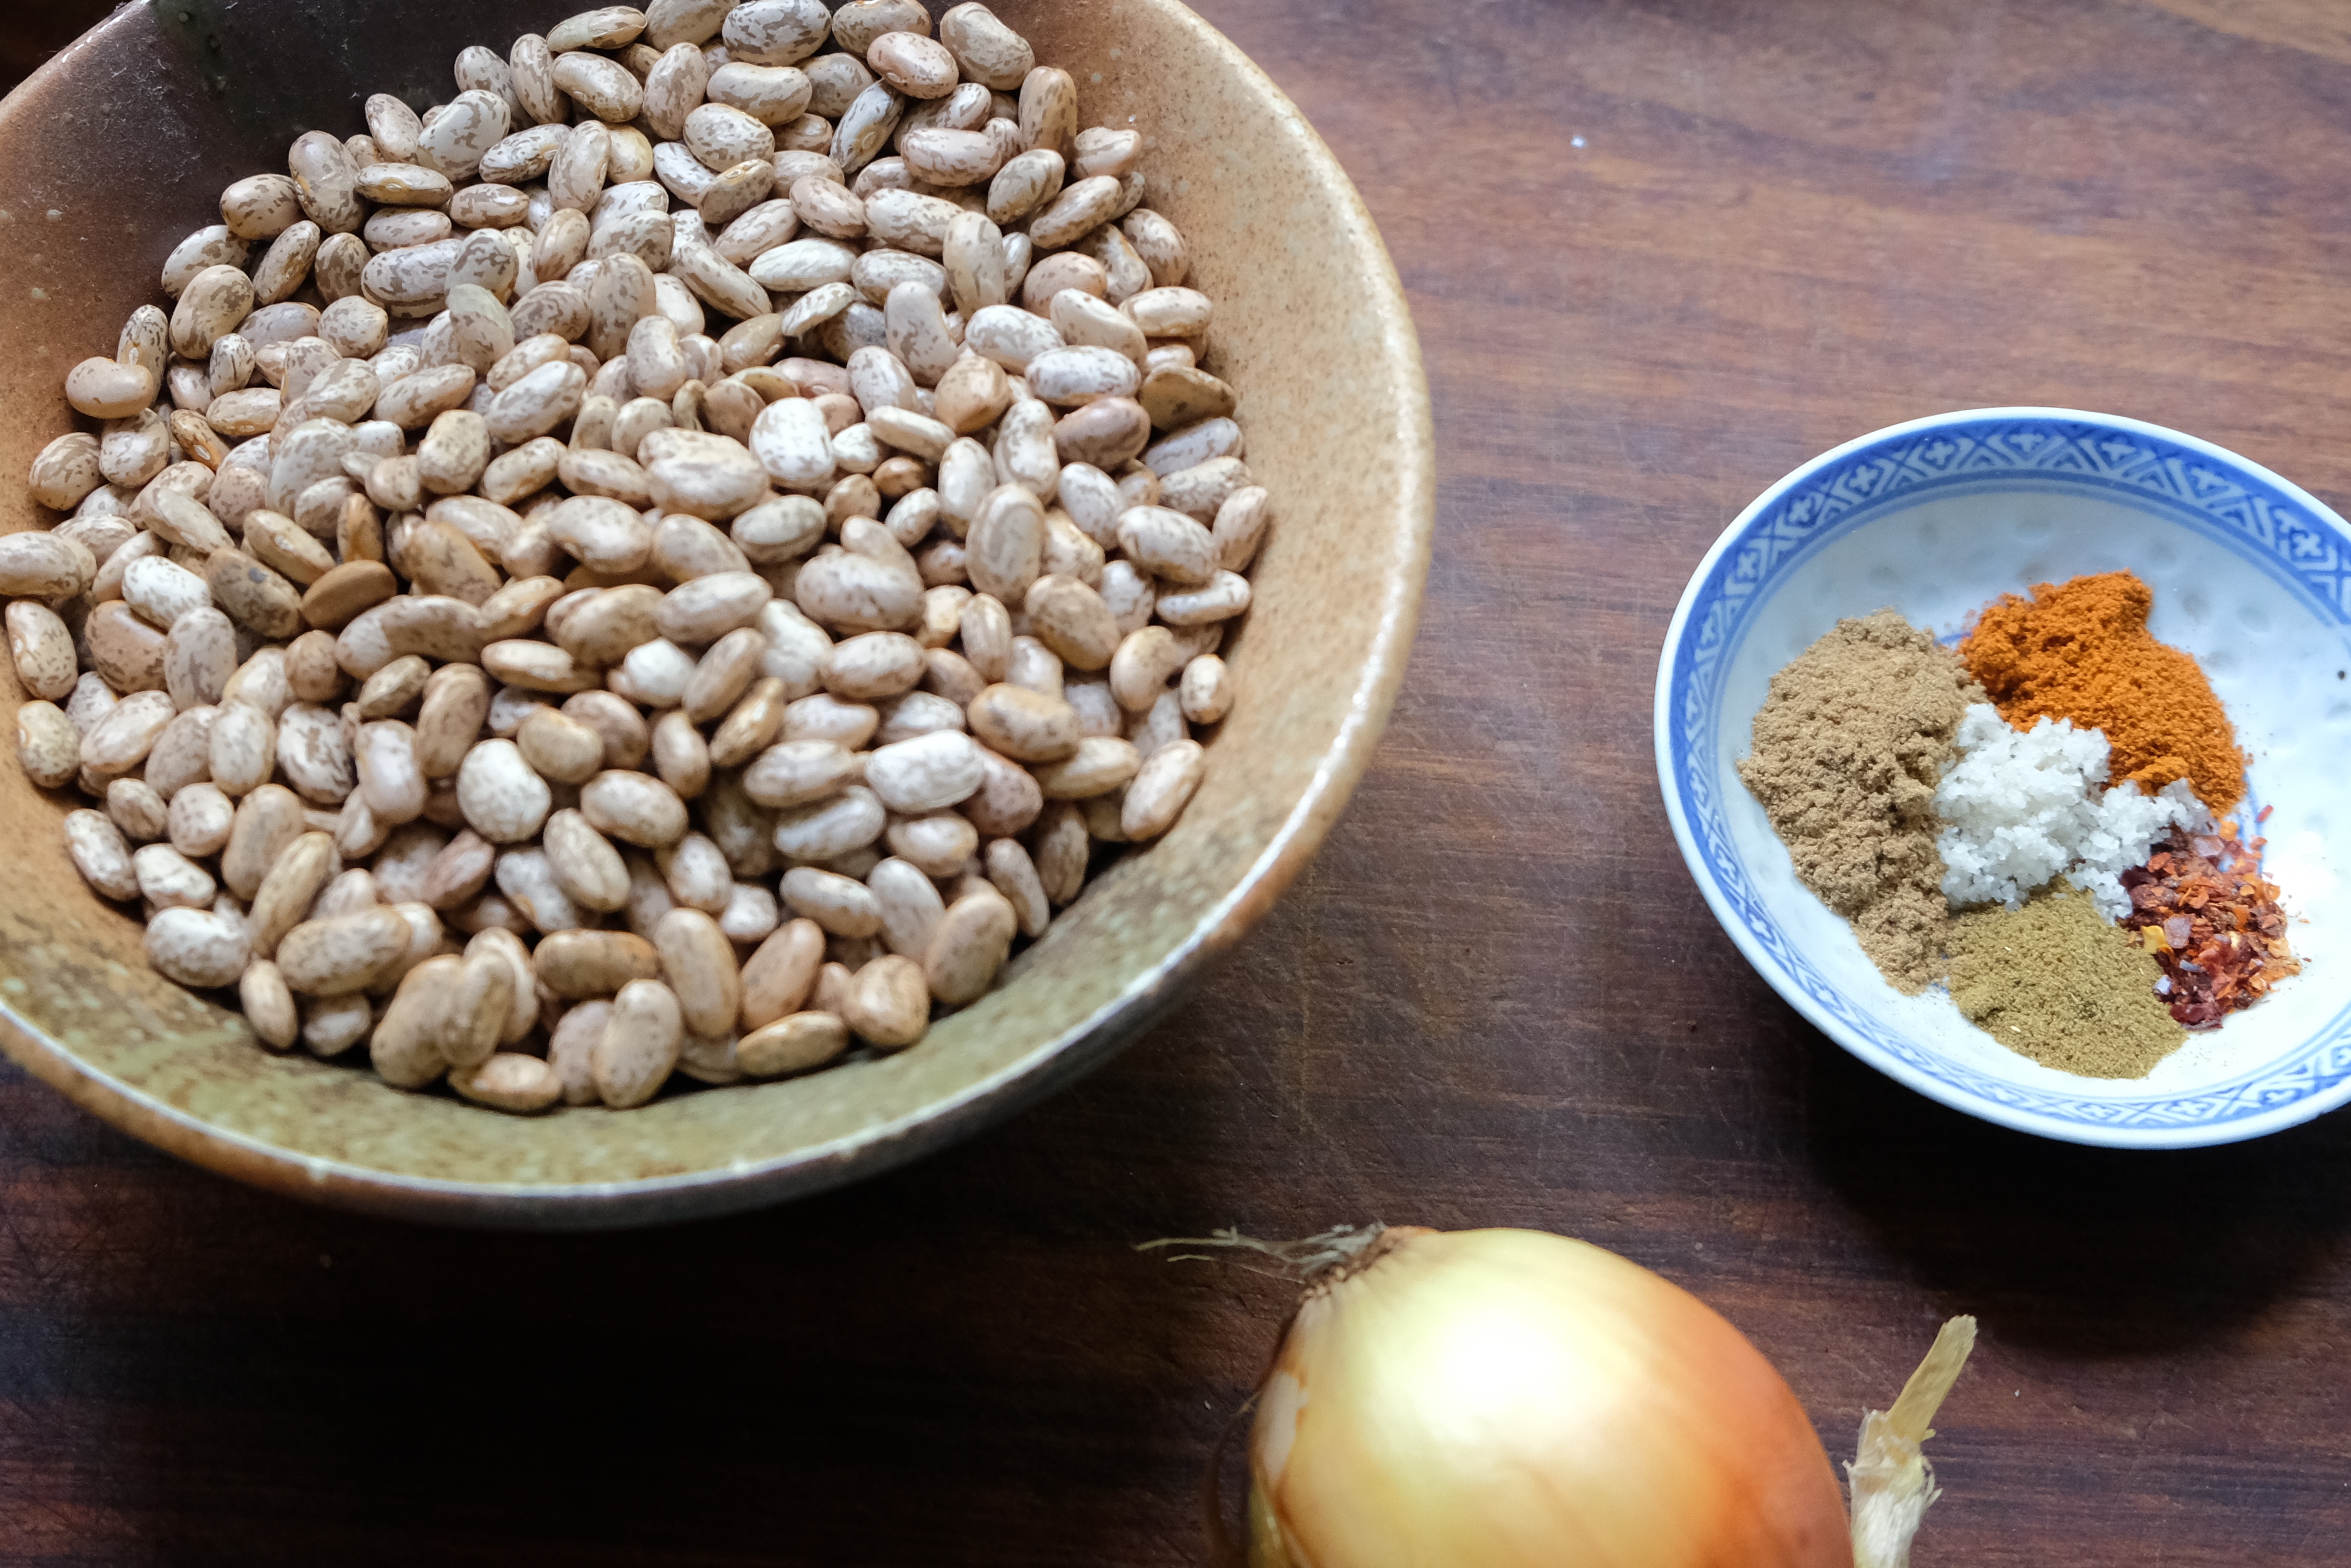
  • 400 g dried pinto beans
  • 1 onion
  • water
  • 1 tsp ground cummin
  • 2 tsp ground coriander
  • 1 tsp ground chipotle
  • 1 onion

Sauce (quantity for 2 burritos):

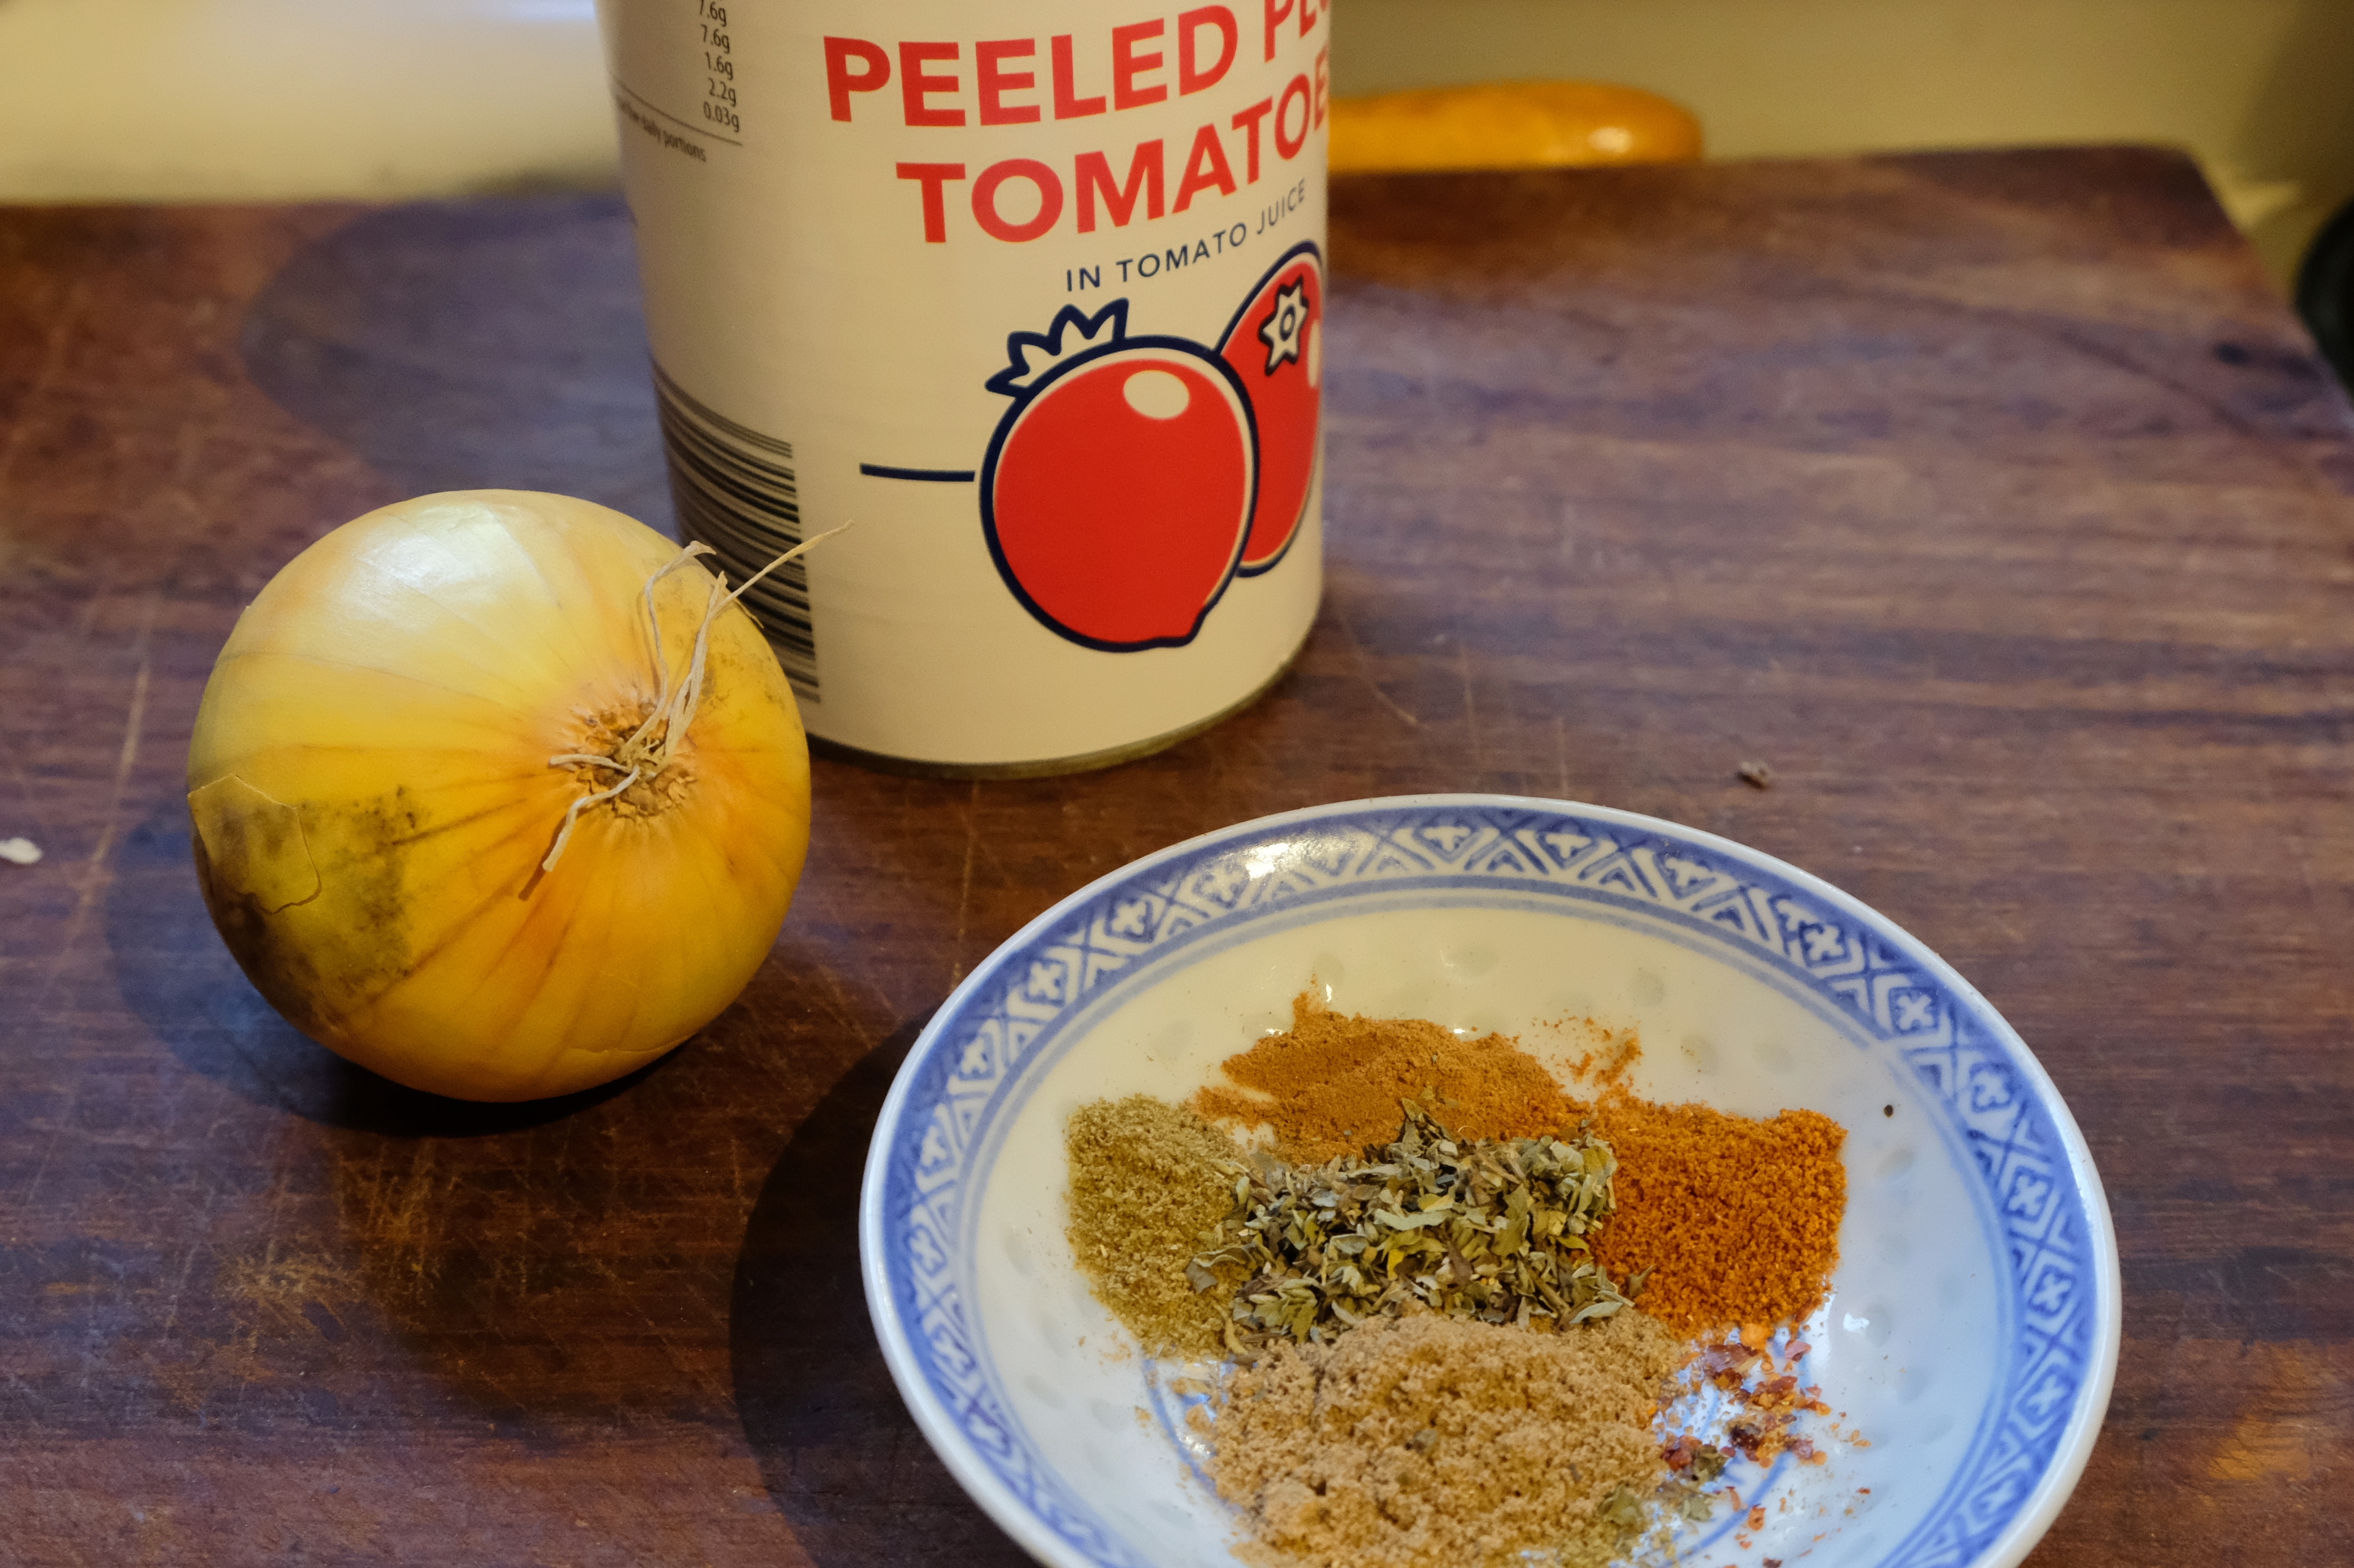
  • 1 can plum tomatoes
  • 1 onion
  • 1 tsp cumin
  • 1 tsp coriander
  • 1/2 tsp cinnamon
  • 1/2 tsp oregano
  • pinch of salt
  • oil

To serve (quantity for 2 burritos):

  • 2 wraps
  • 4 oz grated mature cheddar
  • chopped jalepenos to taste

To garnish (quantity for 2 burritos):

  • 1 avocado, blitzed or mashed with a fork
  • 2 tblsp sour cream
  • cooked white rice with sweetcorn or nacho chips

Preparation

Method: Bean mixRoss Castle 016

  • Cover the beans with boiling water and leave to soak for at least 2 hours, up to overnight.
  • Strain the beans
  • Chop the onion
  • Place the beans, onions and seasoning in a heavy pan or pressure cooker and just cover with water. Bring to the boil and cook till the beans are tender, 45 min to 1.5 hours, typically. The timing will depend on the age of the beans, how long you soaked them, and the method of cooking. The beans should absorb all the water and be tender. If you find the beans are cooked but you have excess water, you can bring them to a rapid boil, with the lid off, to reduce the cooking fluid.
  • Mash the beans slightly – they should still be recognizable as beans but be a bit gooey.

Method: Tomato sauce

Ross Castle 029

  • Finely chop onion
  • Chop plum tomatoes
  • Heat the oil in a pan and soften the onions in it
  • Add the seasoning and the tomatoes, bring to a boil, and then simmer on a low heat for 10 minutes

Method: Assembly and Baking

  • Preheat oven to 180°C
  • Line a dish with greaseproof paper (the wraps tend to stick to the dish otherwise)
  • Place a wrap on a clean flat surface
  • Divide the bean mix into 8, and place 1/8 in the centre of the wrap
  • Spread half the chopped jalepenos over the bean mix
  • Place 2 oz grated cheese on top of the jalepenos
  • Fold the wrap over into a parcel
  • Repeat for second burrito
  • Place the two burritos in the lined dish
  • Cover with the sauce and any left over grated cheese
  • Cover loosely with tin foil
  • Bake in oven for 30 minutes

Method: Serving

  • Slide one burrito out of the dish and place on a plate, spooning some sauce over the top
  • Garnish with sour cream and avocado
  • Serve with rice or nacho chips

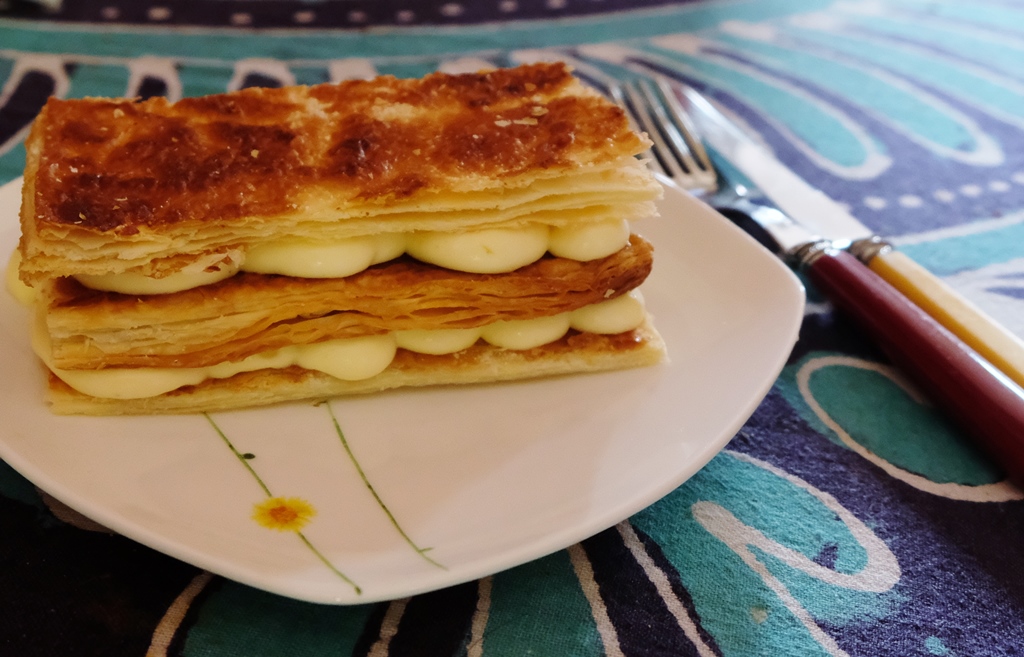
Mille-feuille

This is a classic French pastry. We always treat ourselves when we are in Paris, but when back home, every so often. we make our own.

049

Prepare the pastry cream and the pastry sheets the day before, or in the morning.

Add the whipped cream to the pastry cream and assemble the mille-feuille just before eating them.

Preparation time: 45 min
Cooking time: 2 times 25 min
Serves 4


Ingredients
Pastry cream:
  • 3 yolks
  • 25 g cornflour (2 heaped tblsp)
  • 60 g sugar
  • 300 ml milk
  • 30 g butter
  • 120 ml cream
Pastry
  • 1 sheet puff pastry
  • icing sugar

Method – Pastry

Preheat oven to 250° C. 

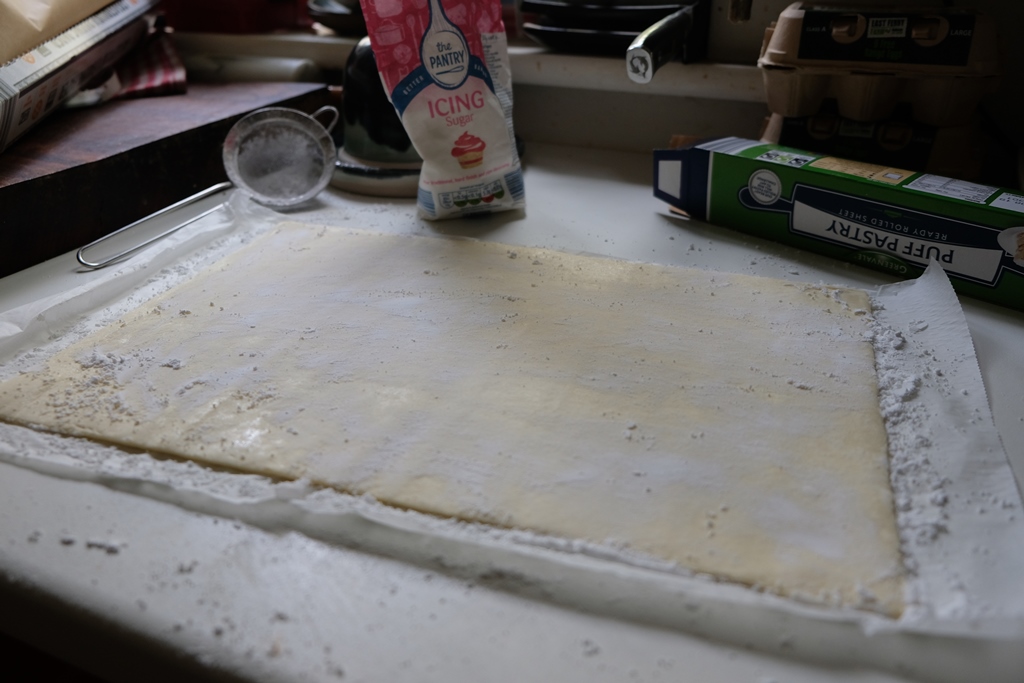
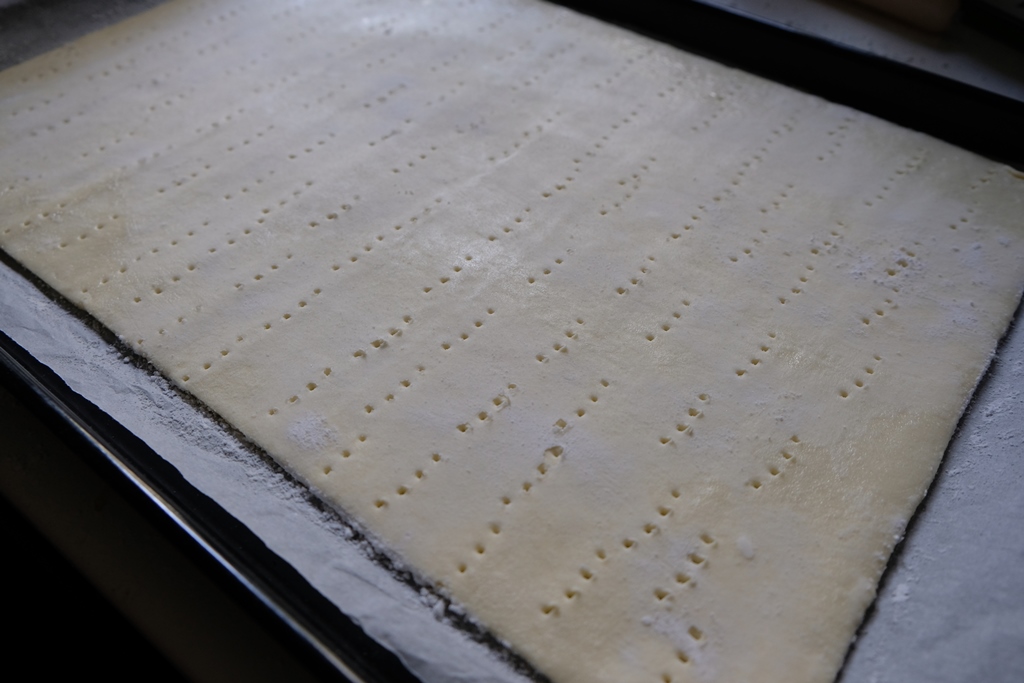
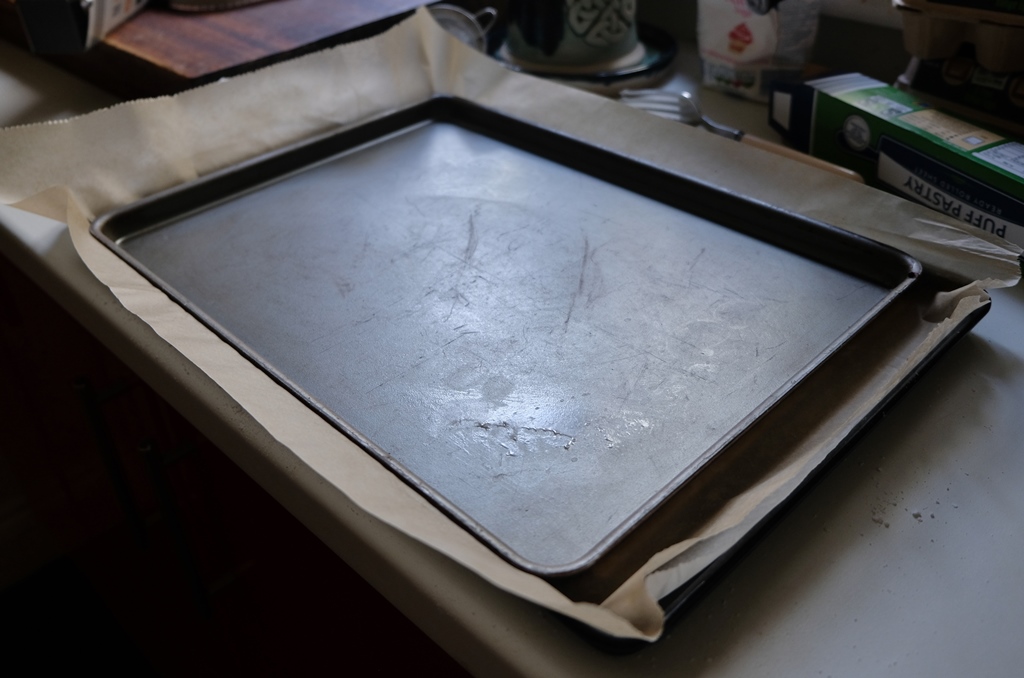
  1. Sprinkle your puff pastry with icing sugar on both sides, working it in lightly with the palm of your hand as if you were flouring a board. Place your puff pastry on a sheet of baking paper placed on a baking sheet. Using a fork, prick holes over the entire sheet.024025
  2. Cover with a second sheet of baking paper and a second baking sheet. This allows the puff pastry to rise evenly and this prevents it from inflating excessively.026
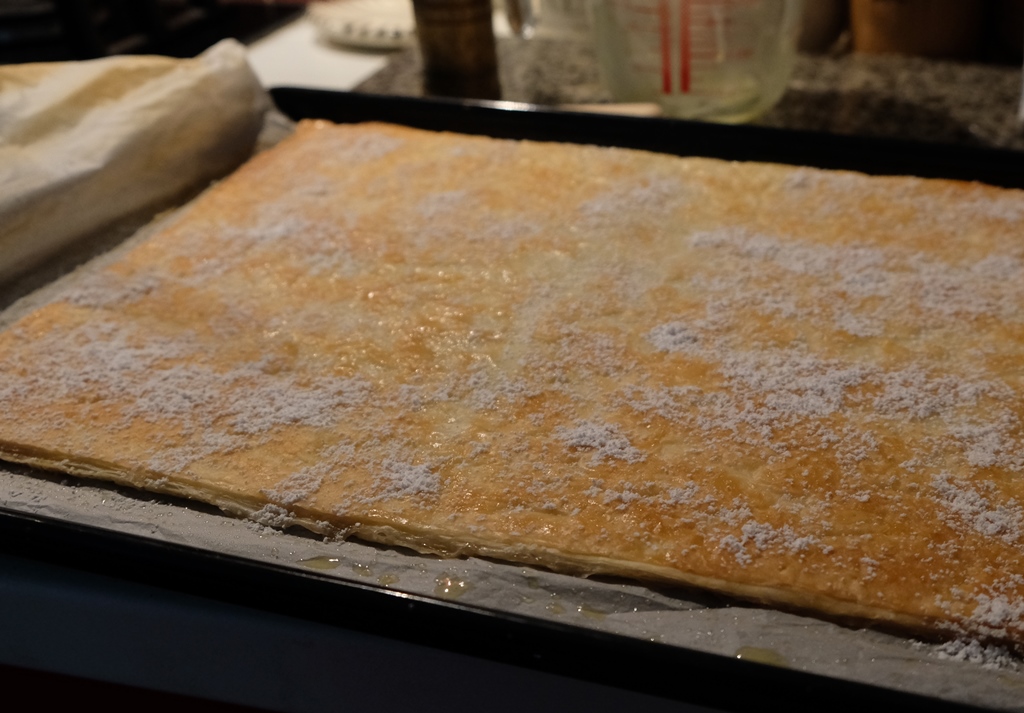
  3. Place the pastry, sandwiched between the two sheets, in the oven and lower the temperature to 190°. Cook for 25 minutes.
  4. After 25 minutes, remove the top baking sheet and sheet of baking paper and let the puff pastry brown for another 5 minutes.
  5. Then take the puff pastry out of the oven.
  6. Start immediately to preheat the oven grill to low power.
  7. Dust the pastry with icing sugar again (do not spread it this time).032
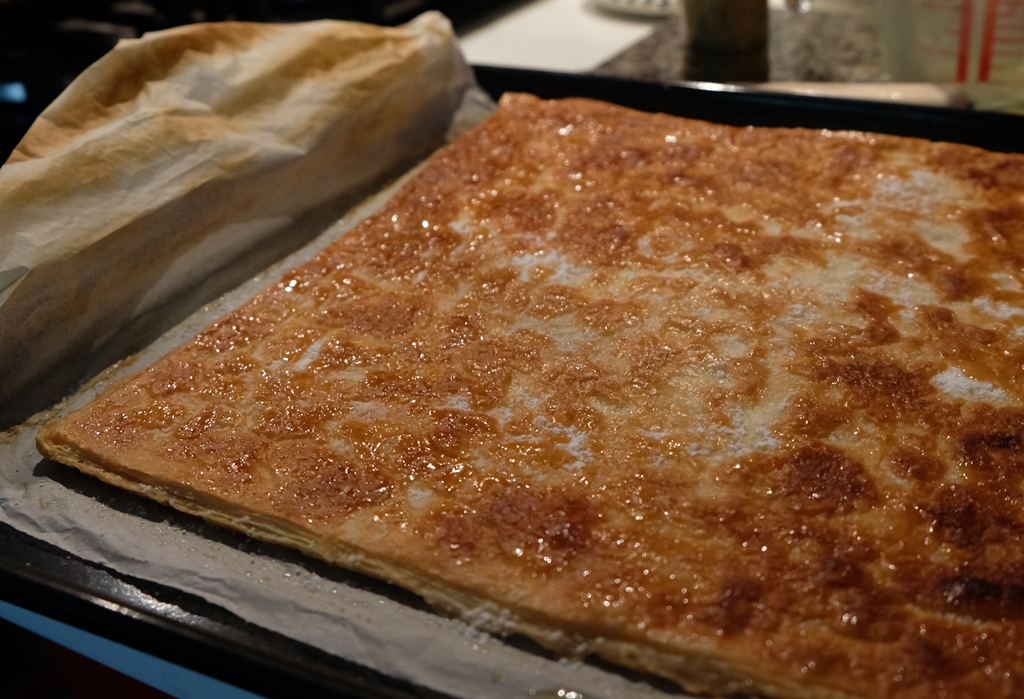
  8. When the grill is hot, put the baking sheet and puff pastry powdered with sugar under the grill and allow to  caramelize. BE CAREFUL: the caramelization can take place very quickly and it is very easy to burn the pastry. As soon as the entire surface of the pastry is caramelized or an edge begins to burn, remove the baking sheet and allow the pastry to cool before cutting.035
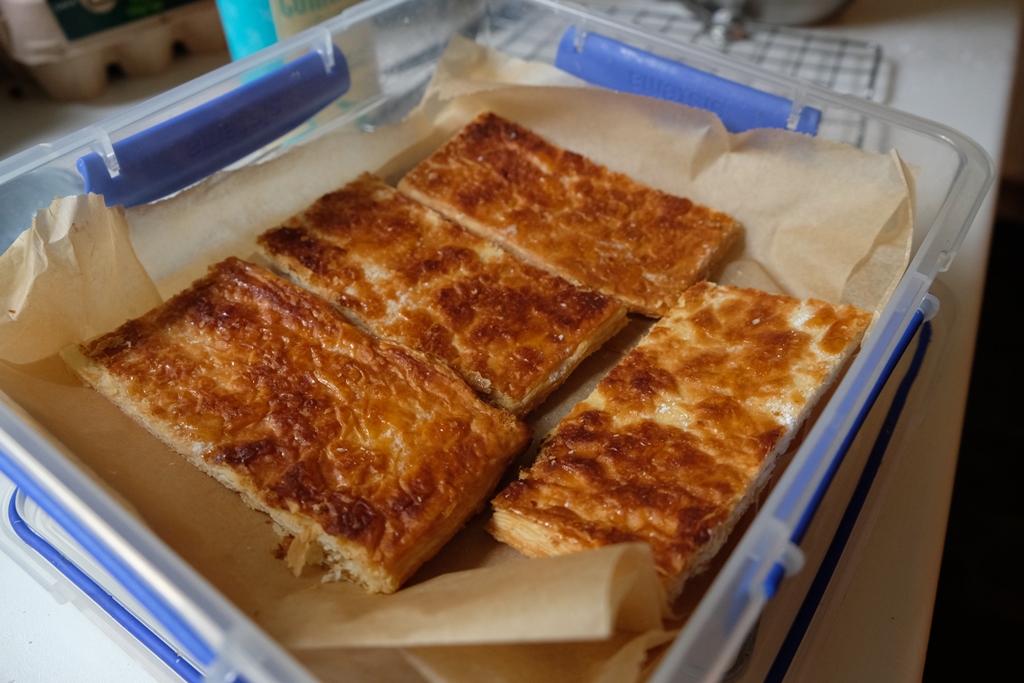
  9. Cut the sheet of pastry in thirds, and then cut each third into quarters, so you have 12 uniformly sized rectangles of pastry.millefeuille geometry
  10. Place the rectangles in an airtight container until you are assembling the pastries. Separate with greaseproof paper.039

Method – Pastry cream

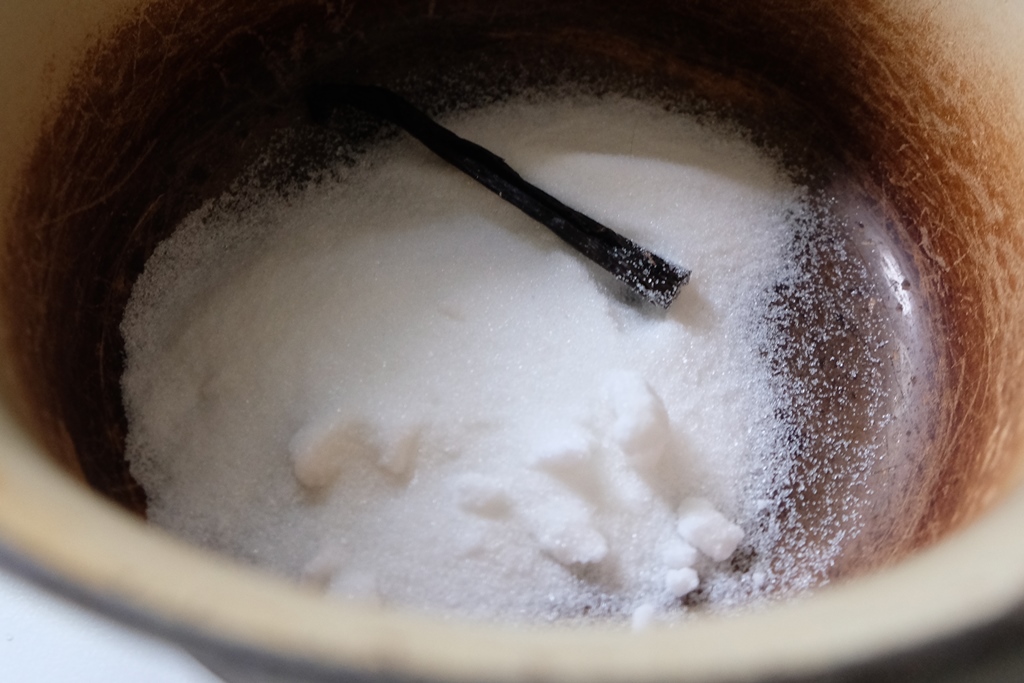
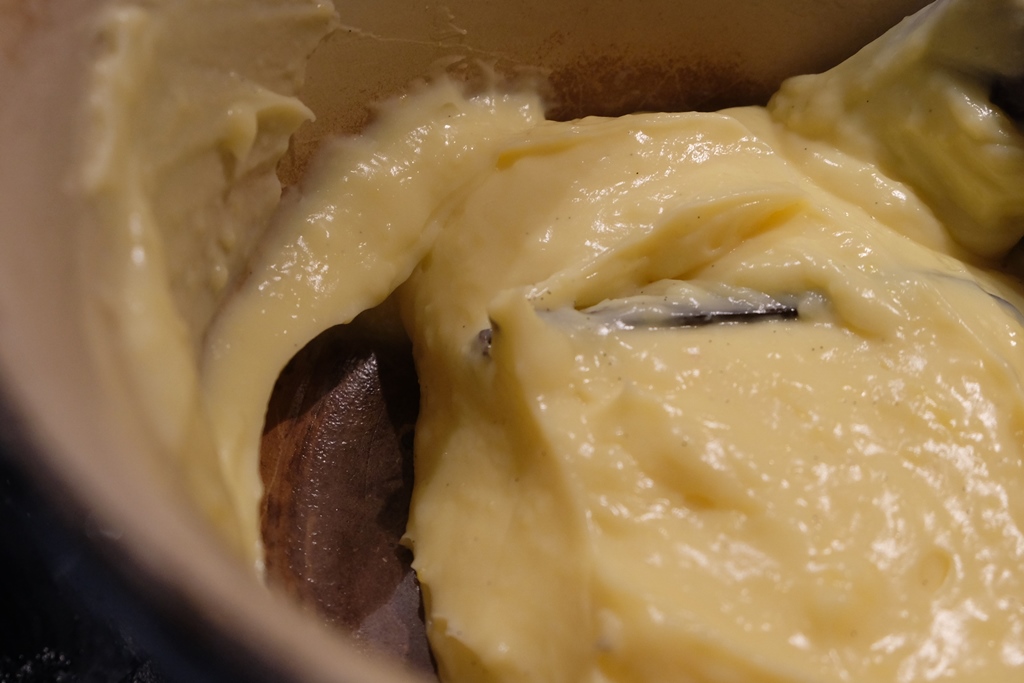
  1. In a heavy based saucepan, bring the milk (300 ml) to boil with half the sugar (30 g) and the split vanilla bean.029
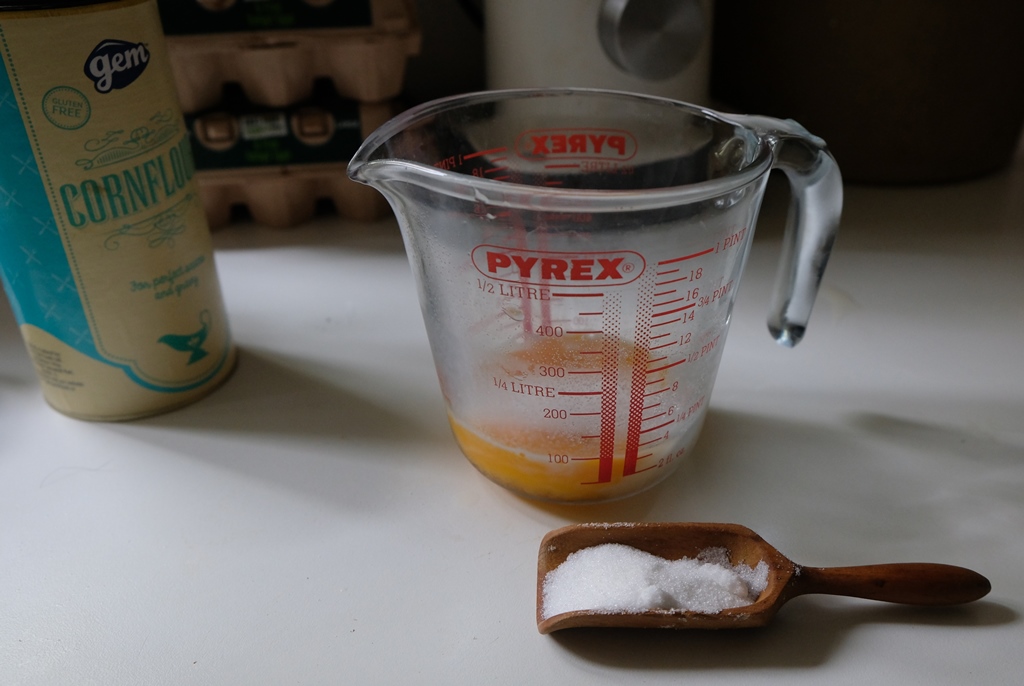
  2. In a bowl, beat the 3 egg yolks with the remaining sugar (30 g).030
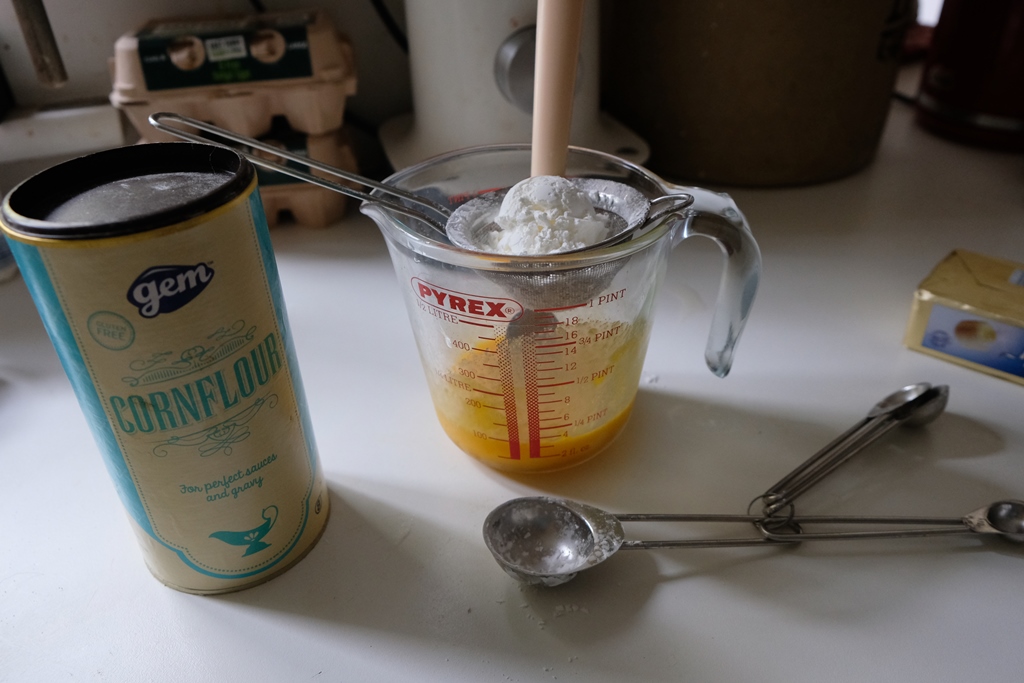
  3. Then add the cornstarch (2 heaped tablespoons) and beat again to obtain a homogeneous texture.031
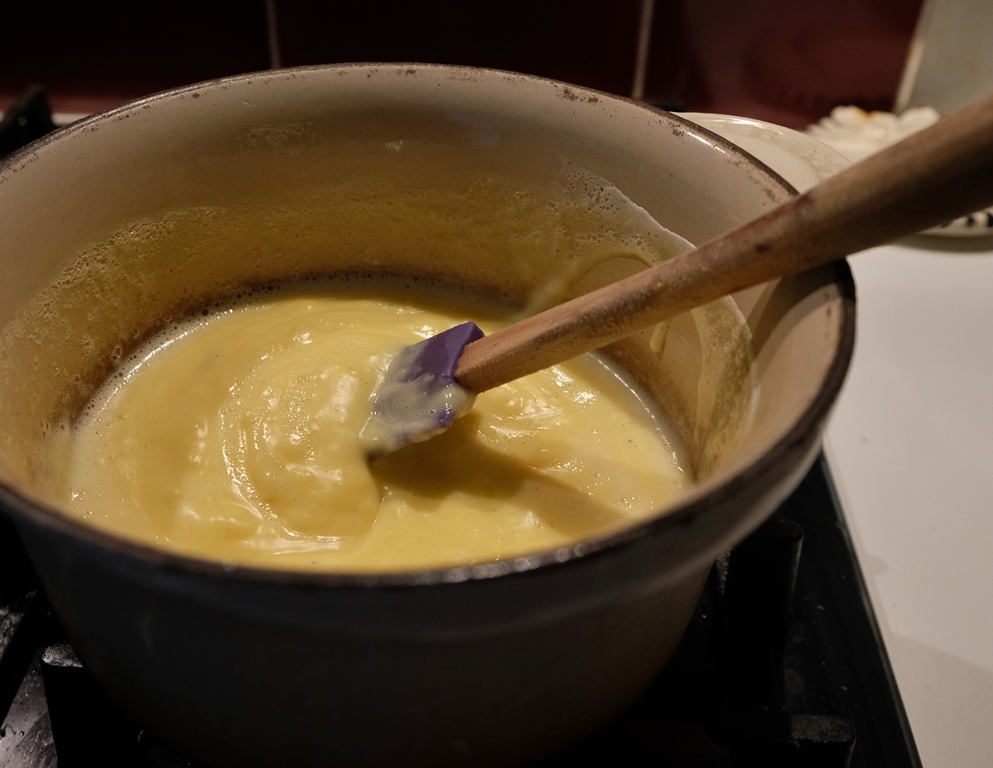
  4. Pour some of the warm milk over the egg mixture and scrape the vanilla bean to loosen the seeds. Pour back into the saucepan and whisk and thicken over a medium heat, stirring constantly with a wooden spoon.033
  5. Off the heat, stir in the butter (30 g).034
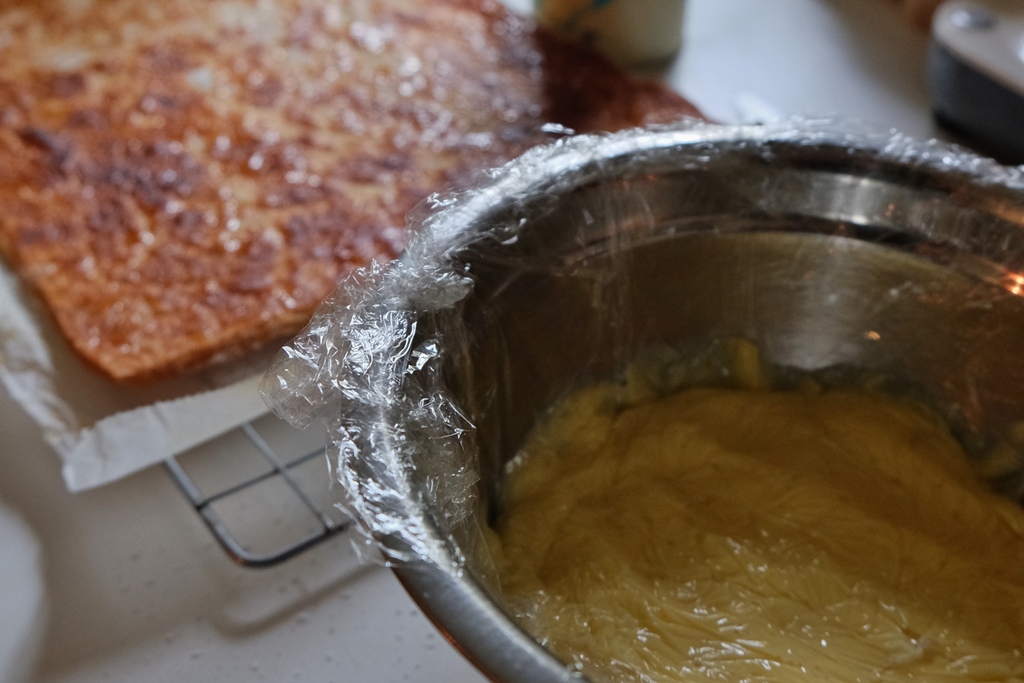
  6. Pour into a dish and cover with cling film, to prevent a skin forming on the pastry cream.  Allow to cool, then place in the refrigerator.036
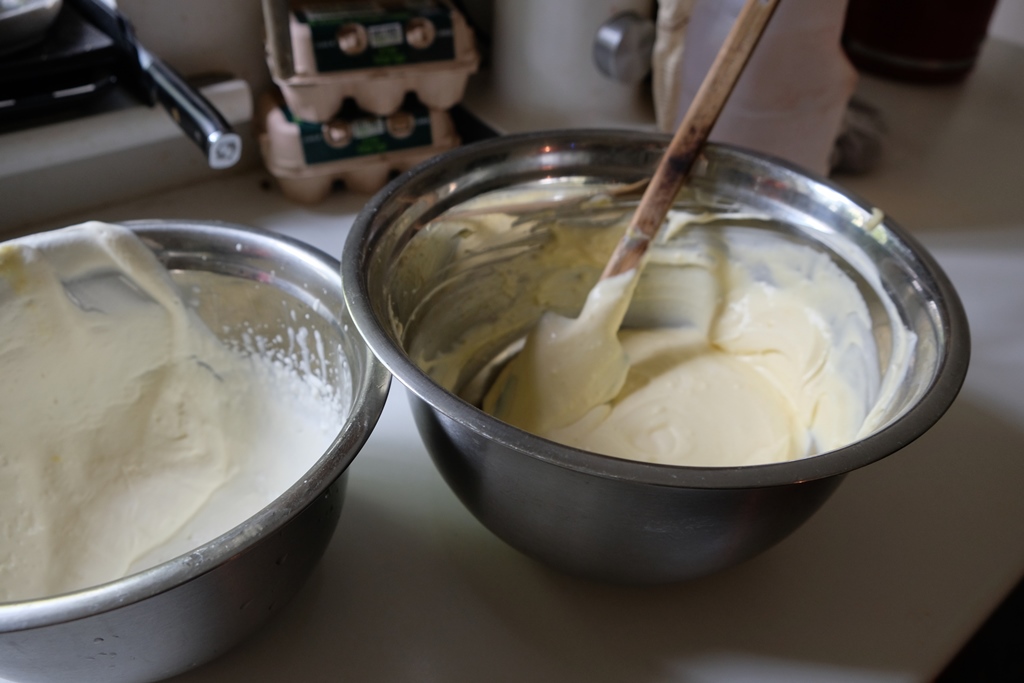
  7. When the pastry cream has cooled down and you are ready to start assembling the pastries, loosen the pastry cream in a bowl with a spatula.045
  8. Whip the cream to a firm consistency and gently add it to the pastry cream.
  9. Transfer everything into an icing pocket with a smooth nozzle.

Assembly

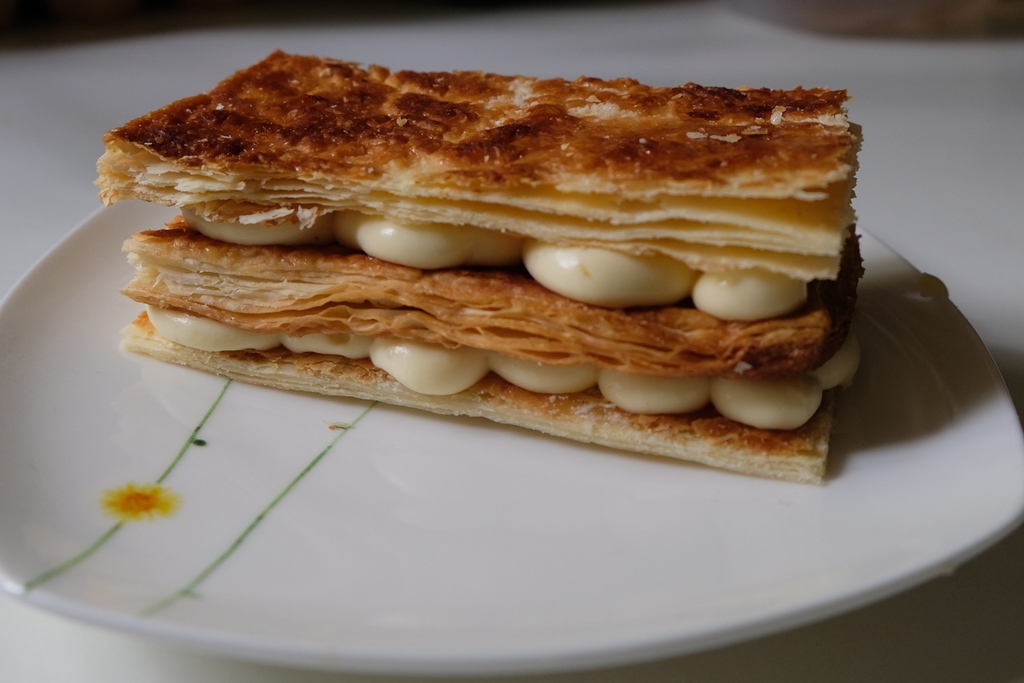
  1. Place a rectangle on the serving dish, and then pipe the pastry cream evenly over the surface. 
  2. Place a second rectangle on top of the cream, and again, pipe the pastry cream over this. 
  3. Place a third sheet on top (keep your best looking rectangles for going on top).046
  4. Keep in a cool place until ready to eat.
  5. Enjoy!050


Cat’s Eyes

Cat’s eyes

I had occasion recently to be doing a 40 mile drive at night, in the dark, in the howling wind and pounding rain, and was very grateful for the welcoming cat’s eyes marking my route ahead of me, making me feel a bit less like I was heading off into the unknown wilderness.

However, after driving for about 15 minutes, I came to the following realization. The only thing worse than having no cat’s eyes on the road is … having intermittent ones. I don’t know if it is deliberate policy, or shoddy workmanship, but every time I came to a sharp bend in the road, the runway lights just stopped. Now, when you’re driving along following the lights down the centre of the road and they stop, you might be forgiven for thinking that they stopped because nothing important is happening. But no. Next thing, you’re looking at a wall and pulling down hard on the steering wheel. And then the cat’s eyes pick up again. What’s going on, Kerry County Council?

I noticed as I drove that there were different types of cat’s eyes. The one you see in the photo above, which has been around a long time, seemed to be good. They were mostly bright, and very few were missing. There were also ones with two small rectangles as the reflective part, and they were bad. Even on straight bits of road about 2 out of 5 seemed to be missing. I say missing because I could see a mark on the road where they should have been. The night that was in it, I didn’t get out to investigate, but either they were pulled out by traffic driving over them, or their self clean mechanism had failed and they had been pushed down and had failed to pop back up.

Cat’s eyes, should you be wondering, have been around since 1933, when they were invented by  Percy Shaw of West Yorkshire, England. The original cat’s eyes consisted of two pairs of reflective glass ‘eyes’ housed in a rubber casing that was protected by an iron housing. Traffic passing over would push the rubber down over the ‘eyes’ to clean them.

Here follows a superb video showing cat’s eyes, or studs, being placed.

http://www.youtube.com/watch?v=4MTqft1N58s&feature=player_embedded

Well worth watching. Thanks Lewy and Phil!

Homebrew – the art of beer making

At last - sit down and relax

A pint of the best

In these dark economic times everyone is returning to old-fashioned values and moving away from rampant consumerism. My goal when I started brewing was not necessarily to make something cheap, but to make something nicer than was available in the pubs and shops.  And I succeeded! And last time I checked, it was coming in at about a euro a pint, so it is also cheaper. Here is some basic information on how to produce a very palatable beer. There are copious notes in brackets, but you will do just fine if you ignore them.  I tend to aim for an American style microbrew, or an English ale, but if you like a more European style beer, go for a different hop and yeast.

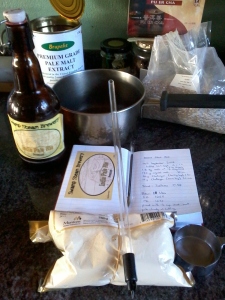
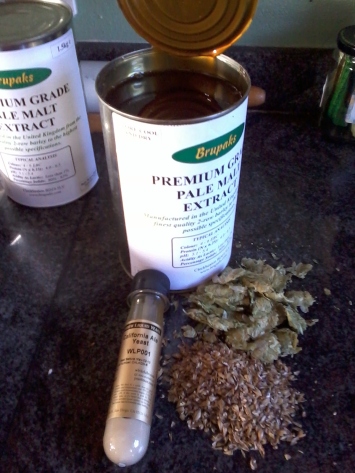
Ingredients - liquid malt extract, liquid yeast, grain and hops

Ingredients – liquid malt extract, liquid yeast, grain and hops

All supplies and ingredients are available from http://www.thehomebrewcompany.ie and other sites. I generally use Brupaks ingredients and find them excellent. If you happen to live near Cork city in Ireland, then you can get CO2 from Munster CO2 in Mayfield (phone 021 450 5550).

BASIC EQUIPMENT

  • 5 gallon brew bucket
  • 1 or 2 large stockpots or similar
  • large metal spoon
  • large strainer
  • muslin
  • thermometer
  • hydrometer
  • sterilising solution
  • length of plastic tubing
  • bottles, cap and capper for bottling, or Cornelius keg and CO2 cylinder for keg system

INGREDIENTS

  • 7 lb malt extract
  • ½ lb crystal malt (grain)
  • ¼ lb toasted malt (grain)
  • 2 ½ oz Cascade hops (boiling) – Try Challenger for an English ale, Hallertauer for European
  • ½ oz Cascade hops (aroma)
  • ½ oz sachet of lager yeast (or ale yeast), or a tube of California Ale liquid yeast

METHOD

  1.  Following the manufacturer’s directions, sterilise the brew bucket, metal spoon, strainer, thermometer, and hydrometer.

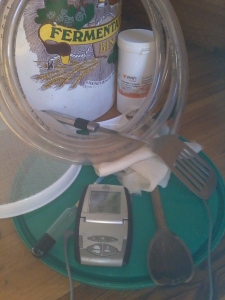
    Brewing equipment

    Brewing equipment

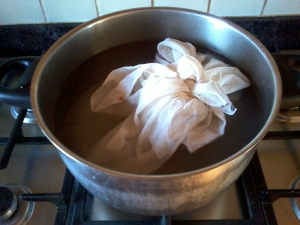
  2.  Tie the grains in the muslin and heat in a large pot of water to 65-70°C.

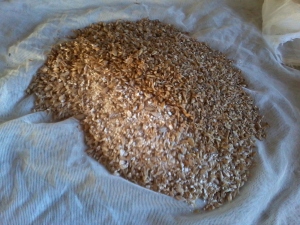
    Grain

    Grain

    Hold at this temperature for at least 30 minutes. It is important not to let it boil at this stage, as this will introduce bitter notes. (Note: grains are optional, but they add extra body to the finished beer.  It will be fine without them though)

    Boiling the grain

    Heating the grain

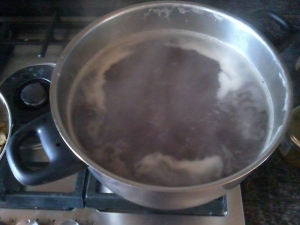
  3. Remove the grains, and divide the water into 2 pots, if you have two, and add the malt.

    Bring the malt extract solution to a rolling boil

    Bringing the malt extract solution to a rolling boil

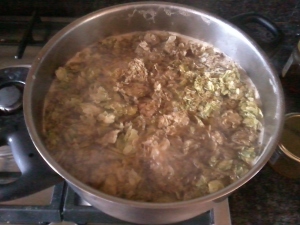
    Over a very low heat, keep stirring until the malt is dissolved. Then bring to a rolling boil.  Now add the boiling hops, and boil for at least 1 hour. Boiling hops impart bitterness. (Note: ideally, the whole ‘length’ of the brew should be boiled at this stage, but unless you have a 5 gallon pot, this is impractical.  I use 2 large pots and divide the malt and hops between them)

    Adding the hops

    Adding the hops

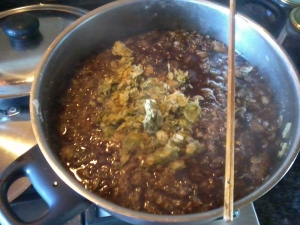
  4. Take off the heat, add the aroma hops, and leave to steep for about 3 minutes. Aroma hops add flavour.

    Adding the aroma hops

    Adding the aroma hops

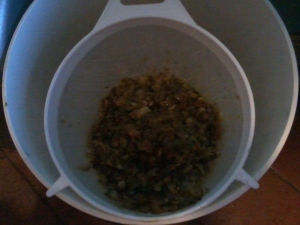
  5. Strain into your sterilised fermenting bin, trying to splash as little as possible. (Note: Splashing while the ‘wort’ is hot can cause it to oxidise, giving it an unpleasant flavour)

    Straining the wort

    Straining the wort

  6.  Add enough cold water to bring the wort up to the full length of the brew, 4-5 gallons.  (Note: 4 gallons will be stronger in alcohol)
  7. When the wort has cooled to 18-20°C, add the yeast, and splash vigorously for about 10 minutes.  (Note: Now you are trying to incorporate as much oxygen as possible, to feed the yeast). (Note: In this recipe, if I am using a lager yeast, but fermenting at ale temperatures, this recreates the American ‘Steam beer’.  If you want to make a lager, you will need to be able to chill the brew to about 10°C during fermentation.  You can also use an ale yeast for a standard ale.)

    Waiting for wort to cool

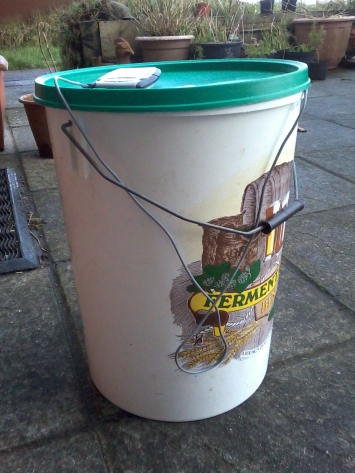
    Waiting for wort to cool – I’ve put it outside to speed up the cooling process and have kept the lid on to keep it sterile

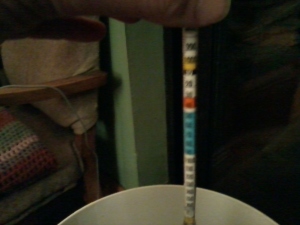
  8.  Measure the specific gravity and take a note of it.  (Note: Typically, the last 2 digits of the specific gravity give you the alcohol content of the finished beer – eg a starting gravity of 1046 will give you an alcohol content of 4.6%.)

    Measure the specific gravity

    Measure the specific gravity

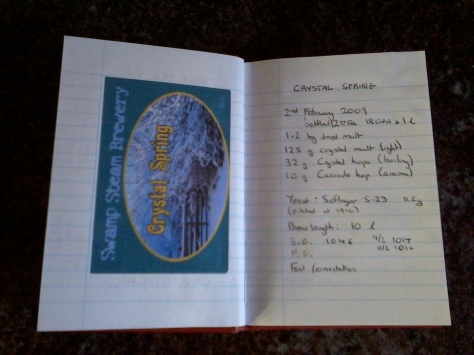
  9. Leave to ferment for about 10 days, or until the specific gravity has stopped changing: it should be around 1012.Log book
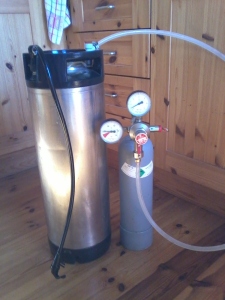
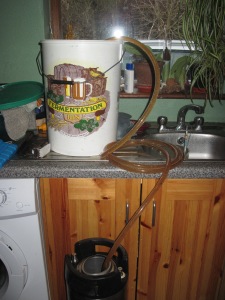
  10.  If you have a keg, siphon the beer into the sterilised keg and add gas. You can drink this pretty much any time now, though it does improve after a few days.

    Cornelius keg system

    Cornelius keg system

    Siphoning

    Siphoning

  11. If you are using bottles, you will need to ‘prime’ the solution to produce secondary fermentation in the bottle, so that the beer is fizzy.  To make a priming solution, use ¼ cup dried malt/gallon of wort, or 1/3 cup malt extract/gallon of wort.  Boil this in ½-1 pint water for 5 minutes and cool.  Add to the wort, stir well, and let settle. Siphon into sterilised bottles and cap.  You will need to leave these 10 days to 2 weeks before drinking, to allow for the secondary fermentation.

    Bottling equipment

    Bottling equipment –  some of what you will need for bottling

MORE NOTES

DO NOT USE SUGAR AT ANY STAGE (unless you like the classic cheap homebrew flavour)

STERILISE – anything not actually boiled should be sterilised – brewing bin, strainer, spoon, siphon, thermometer, hydrometer, bottles, bottle caps…

Experiment with different ingredients to see what effect they have. The site has notes on the flavour given by the different hops and yeasts, so experiment with those to achieve your desired effect.

Consider that water is a large part of the brew.  If your tap water tastes as though it has been heavily treated with chemicals, you might try bottled water, or if there is a spring nearby, you could try that.

It is not recommended to brew at the same time as baking, to prevent cross contamination by airborne yeasts.

A note on yeasts:  The liquid yeasts are more expensive, but you can taste the difference.  Dried yeasts are reliable and you can keep a supply of them on hand.  It is recommended to rehydrate them in ¼ pt warm water and leave to activate about 30 minutes before ‘pitching’ (adding to the wort).  For lagers, which are bottom fermenting yeasts and require lower fermentation temperatures (and longer fermentation times), a liquid yeast is best.  Ale yeasts are top fermenting and are happy anywhere around a reasonable room temperature.  Lager yeasts can be used at higher temperatures.

ENJOY

Fraisier – the taste of summer

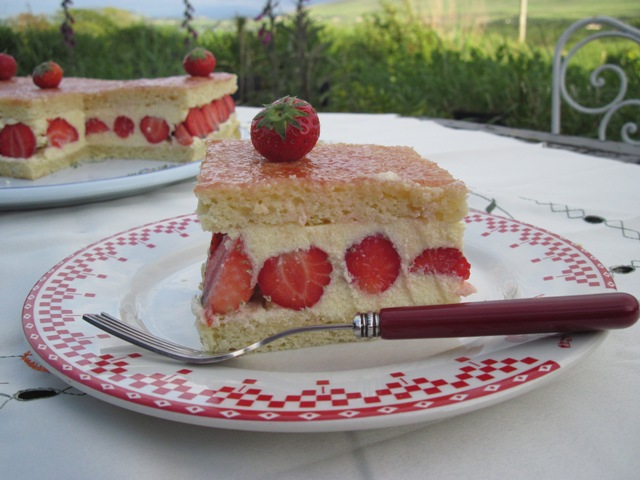
Slice of fraisier

In spite of the poor weather in Ireland, it is summer, and there are strawberries. Maybe not as many as in previous years, but at last, when you walk into a vegetable shop, the aroma of strawberries assails your nostrils as you pass by the punnets of red berries piled high. Gone are the rock hard, irradiated, odourless berries that pass as strawberries for the rest of the year. Now is the time to make the most of locally grown, tender, tasty berries. And my favourite way to do this is with a fraisier. Many of you may not have heard of a fraisier. I certainly hadn’t before I stumbled across one in Paris, during strawberry season (‘fraise’ is French for strawberry). It is not by any means to be confused with the strawberry flan: a sponge base filled with whipped cream and topped with strawberries. The fraisier is definitely a French confection. Yes, there is a sponge base, but it is made with ground almonds and soaked in a kirsch scented syrup. Yes, there is a cream filling, but it is not mere whipped cream; it is mousseline cream made with butter and eggs and whipped to a fluffy light texture. And yes, there are strawberries, but precisely arranged in regimented rows so that every slice of the fraisier looks perfect.

I have tried several recipes for fraisiers, and what follows is my favourite combination. They are very flexible, and the topping is a matter of taste. Sometimes they are finished with a thinly rolled sheet of marzipan, but my preference is for redcurrant jelly, either directly brushed onto the sponge, or poured over a thin layer of the mousseline cream on top of the sponge.

Fraisier

Ingredients

Cake:

  • 1 egg
  • 4 egg yolks
  • 4 oz + 1 oz (100 g + 25 g) caster sugar
  • 4 egg whites
  • 2 oz (50 g) all purpose flour
  • 2 0z (50 g) ground almonds
  • 1/2 oz (10 g) melted butter

Mousseline cream:

  • 250 ml milk
  • 5 oz (125 g) caster sugar
  • 3 eggs
  • 1 oz (25 g) cornflour
  • 2 oz + 3 oz (60 g + 65 g) butter
  • 20 ml kirsch

Syrup:

  • 4 oz (100 g) granulated sugar
  • 100 ml water
  • 2 tblsp kirsch

Strawberries:

  • 1 1/2 lb (600 g) fresh strawberries, as uniformly sized as possible

Method

Cake:

  1. Preheat the oven to 180°C (356°F) for a fan oven, 20° hotter for a convection oven. Line a large baking sheet with baking parchment.
  2. Whisk together the whole egg, the yolks, and 4 oz (100 g) of sugar until the mixture is pale and thick.
  3.  Beat the egg whites with the remaining sugar until stiff, but not dry.
  4. Combine the yolk mixture with the whites.
  5. Add the sifted flour and ground almonds, folding them in with a metal spoon or whisk.
  6. Finally, add the melted butter, folding it in gently.
  7. Pour the cake batter into the tin, making sure it fills the corners. Bake in the preheated oven until golden: 10-15 minutes.
  8. When the cake is done, turn it out onto a damp tea-towel, peel off the parchment, and cover with another damp tea-towel. This will keep it nice and moist. Leave to cool.

Syrup:

  1. Bring the sugar and water to the boil, stirring constantly.
  2. Remove from the heat and add the kirsch.
  3. Leave the syrup to cool.

Mousseline Cream:

  1. Prepare a pastry cream as follows:
    1. Heat the milk to about 70°C (158°F).
    2. While the milk is warming, whisk together the eggs, sugar, and cornflour.
    3. Pour the warm milk over the egg mixture, stirring constantly, and return the mixture to the pan.
    4. Heat gently, stirring constantly, until the mixture thickens. Don’t worry if the mixture becomes lumpy, just keep stirring it and it will become smooth again.
  2. Whisk 2 oz (60 g) butter into the pastry cream, and leave it to cool.
  3. Whisk the remaining butter into the cream and flavour with kirsch.

Assembly

  1. Cut the sponge in half so you have two approximately square pieces of sponge.
  2. Place one piece of sponge on the serving plate, and brush the sponge with half of the syrup.
  3. Spread a thin layer of mousseline cream over the sponge, to hold the strawberries in place during assembly.
  4. Line the edges of the sponge with half strawberries, with the cut edge facing out. Fill in the inside with the remaining strawberries, as evenly as possible (it will look better when it is cut).
  5. Fill in the gaps with the remaining mousseline cream, keeping enough to cover the top sponge if you like. A piping bag is useful for applying the cream without dislodging the strawberries.
  6. Brush the second piece of sponge with the remaining syrup and place it on top of the cake, syrup side down.
  7. Decorate the sponge by brushing it with warm redcurrant jelly, or by spreading a thin layer of mousseline on it, or by covering it with a thin layer of marzipan.

Pho – Taoist Fast Food

Pho is a traditional Vietnamese dish of rice noodles, marrowbone stock, beef and vegetables. So why have I called it Taoist fast food? Well, once the broth is made it is certainly fast. If you have a supply of broth, it only takes 10 minutes to prepare and cook this dish!

For the Taoist background information I defer to my husband, an acupuncturist who also practices Taoist Tai Chi. Here is what he has to say about pho.

Pho tonifies the three treasures: Jing, Qi, and Shen. The marrowbones in the stock nourish the Jing, which in Chinese Medicine terms is the constitutional strength, or essence, stored in the kidneys and bones. Also in the stock is cinnamon, which in Chinese Medicine is a Yang tonic and has a similar action to that of ginseng. Ginger appears in this dish at two stages, cooked in different ways for each stage. The ginger in the stock has been roasted and then simmered slowly in the stock for a long time, which has the effect of concentrating its essence. The very fact of roasting it effects a transformation, which is consolidated by the simmering. On the other hand, the ginger used in the later stage is freshly grated and only cooked very briefly but at a high temperature. Yin and Yang.  Ginger should be ranked among the so-called miracle foods or super foods as it is good for your digestion. In Ayurvedic medicine toasted sesame oil has a similar status. Energy, in oriental philosophy, is called Qi. The long cooking time of the stock translates into a slow release of food energy, whereas the rice noodles, which are pure rice starch, provide a quick release of energy. Also, the character for Qi is the same as the character for steam rising from rice. You will see lots of steam in the photos below.  Garlic is a blood cleansing tonic and helps to boost the immune system. Red peppers are full of vitamins and antioxidants, which are responsible for cleaning up free radicals, associated with the symptoms of aging. Green vegetables are also packed with vitamins and as we all know, are good for us. Shen, in Taoist philosophy, refers to the mind or consciousness. This is a hot dish: not as hot as a vindaloo curry, but hot enough that you know you are eating it … it concentrates the mind. You can find out more about Chinese medicine at https://www.acupuncturecork.com/

The key to this dish is a good stock. Ask your butcher for marrow bones – they’re very good for you, and they’re free.

Ingredients: (to serve 2 people)

Broth: (this makes more than you need – the remainder can be frozen)

  • 3 kg marrow bones/knuckle bones
  • 4 l water
  • 2 onions
  • 1 piece of root ginger about 3 inches long
  • 5 heads of star anise
  • 1 piece of cinnamon stick, 3 inches long
  • 5 dried chillies
  • 6 cloves
  • 4 tablespoons fish sauce

Beef:

  • 200 g sirloin or round steak
  • chilli sauce (to taste)
  • 1 generous thumb of ginger, grated
  • 1-2 cloves garlic, crushed
  • 1 tblsp toasted sesame oil

Vegetables:

  • 1 red pepper (bell pepper)
  • 2 heads pak choi or 10 leaves of Chinese cabbage

Noodles:

  • 200 g rice noodles

Preparation:

Broth:

Roast the two onions (in their skins) and the ginger in the oven at 180°C for 30 minutes. While they are roasting, cover the bones with water in a large stock pot and bring the water to the boil. As soon as the water starts boiling, drain the bones and rinse them. Cover them with fresh water, bring the pot back to the boil, and skim off any scum or impurities.  Reduce to a simmer. Remove any burnt skin from the onions, and peel the ginger. Add the onions and ginger to the stock, together with the star anise, cinnamon, chillies, and cloves.  Cover the pot and leave it to simmer for three to four hours. At the end of the simmering time, strain the stock and leave it to cool. After chilling, the stock should have a jelly like consistency and there will be a hard layer of fat on the surface. Don’t be tempted to throw out the fat: a lot of flavour is locked up in there. It also gives a lovely golden sheen to the finished soup.

This should make about 3 litres of broth. This can be frozen in individual tubs for use later. For two people you will need 400 ml broth. I freeze it in lots of 400 ml in old ice-cream tubs.

Beef:

Cut the beef on the diagonal into slices about 2 mm thick. Cutting it on the diagonal increases the surface to volume ratio. A very sharp knife should be used for slicing the beef so that there is a clean cut that seals the fibres.  Make a quick marinade with the other ingredients and rub it in to the sliced beef. If you can get hold of it, I highly recommend Mic’s Chilli sauce, either  3 chilli Inferno or 4 chilli Inferno Extreme, for the marinade. Set the beef aside.

Vegetables:

The chopped vegetables. In this case I have used Chinese leaves (Chinese cabbage).

Cut the  red pepper into squares about 1.5 cm wide, and cut the pak choi leaves width-ways into sections about 2 cm wide.

Noodles:

Put the rice noodles into boiling water and simmer for about 6-8 minutes or until soft.  Drain.

To serve:

The hot stock. You can see the golden fat floating on the surface.

Warm 400 ml stock in a sauce pan.  In a very hot wok, fry the beef in sunflower oil. As soon the beef starts turning brown, add the sliced red peppers and then the pak choi, making sure it doesn’t burn. To cook the greens add a splash of stock or water to create steam, which will cook the greens. The wok needs to be hot enough that the liquid turns to steam instantly, so that the beef and vegetables are not boiling in water.

Stir frying the beef in a hot wok. It should be sizzling hot – you can see the steam rising.

After a minute the vegetables are added to the beef.

Start assembling the dish by putting the cooked noodles in the bottom of a bowl.

After topping the noodles with the fried beef and vegetables, pour the hot stock into the bowl.

Place the noodles in individual bowls, then top with the fried beef and vegetables and cover with broth. When we had this recently at a Vietnamese restaurant in Paris, it was served with chopped fresh chillies and a wedge of lemon on the side.

Home-baked Pizza

Cooked pizza

Maybe it’s because I grew up in a rural area where pizza delivery didn’t happen, or maybe it’s because my mother always cooked from scratch, but making pizza is one of my many happy childhood memories, and is something that I still love to do.

I have refined the process slightly by investing in a pizza stone, which is a terracotta slab that is preheated and holds the heat, simulating to some extent the effect of a pizza oven.

Pizza stone

I’m a bit of a traditionalist where pizza is concerned and tend not to go for fancy toppings, but I know people who will look in the fridge and put whatever is there on top of their pizza. I also have it on good authority that if you are in Scotland and ask for a pizza supper, you will get pizza deep fried in batter and served with chips!

Sliding the pizza onto the stone

I have spent years puzzling over the best way to get the risen dough onto the hot pizza stone without knocking all the air out of it, and have recently perfected a technique. I leave the dough to rise on a flexible nonstick baking sheet (sold as reusable oven liner/cake tin liner), and then just slide the sheet onto the stone when it is time. When the pizza is cooked, the sheet slides off the stone, and the pizza slides off the sheet. Perfection!

Pizza base

  • 1.5 cups strong flour (plain flour will do)
  • 3/4 cup warm water
  • 2 tsp fast-acting yeast
  • 1/2 tsp salt

I use a stand mixer to make the dough. Then I can make the sauce while the mixer kneads the dough. If you don’t have a stand mixer, you will need to knead the dough by hand.

  1. Place the flour in the bowl of a stand mixer with the dough hook attached.
  2. On a slow speed, add the yeast, and then the salt.
  3. On a medium speed, add the water.
  4. When the dough has formed a homogeneous mass, turn the speed up to high and leave for 5 minutes (keep an eye on the mixer to make sure it doesn’t walk off the work surface). If you don’t have a mixer, knead the dough by hand for 10 minutes until it is smooth and elastic.
  5. When the dough is kneaded, cover the bowl with a tea towel and leave the dough to rise in a warm place for 45 minutes.

    Dough before rising

    Dough after rising

  6. Dust the work surface  (or non-stick sheet) with a mixture of flour and coarse cornmeal.

    Sheet dusted with cornmeal and flour

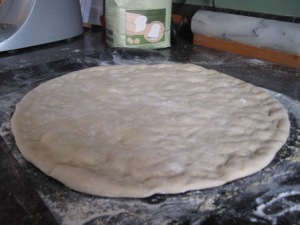
  7.  Turn the dough out onto the work surface and work it into a disk about 13″ in diameter. Make a little rim around the edge. Leave it to rise for 30 minutes.

    Pizza base

    Pizza base (after rising)

Pizza sauce

  • 1 400 g can chopped tomatoes or 500 ml tomato passata
  • 1 medium onion, finely chopped
  • 1 clove garlic, crushed
  • pinch salt
  • pinch sugar
  • 1 tsp balsamic vineger
  • 1 tbslp dried oregano
  • 1 tblsp olive oil
  • freshly ground black pepper to taste

Using the chopped tomatoes gives a chunky topping, while using the passata gives a sauce more like you find on commercial pizzas. It’s a matter of preference, or what you have in the house on the day, which one you use.

  1. Saute the onion and garlic in the oil over a medium heat until the onion is translucent.

    Translucent onions

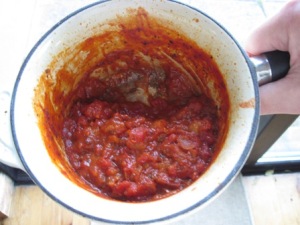
  2. Add the other ingredients and bring to a boil, while stirring constantly. Reduce the heat, and leave to simmer for 45 minutes. The sauce should be thick enough to stand up in peaks – otherwise it will make the crust soggy.

    The sauce should be thick

    The sauce should be thick

Baking the pizza

  • Pizza base (see above)
  • Pizza sauce (see above)
  • 200 g grated mozzerella
  • Optional toppings: eg peppers, mushrooms, olives, jalepenos, salami, pepperoni…
  • Fresh basil
  1. Preheat the oven to 220°C. If you have a pizza stone, heat it up in the oven. Otherwise, preheat a heavy baking tray.
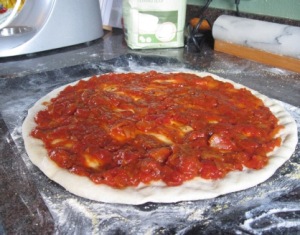
  2. Spread the sauce over the base, leaving the rim clear of sauce.

    Leave the rim clear of sauce

    Leave the rim clear of sauce

    Add the toppings of your choice. I always put the cheese on last, but you may prefer to put your extras on top of the cheese.

  3. When the oven is hot, take the stone or baking tray out, being careful not to burn yourself. Transfer the pizza onto the stone or tray (see my note above) and return it to the oven.
  4. Reduce the heat to 180°C and bake for 10 minutes.
  5. Remove from the oven. To serve, slide the pizza off the stone or tray, scatter some fresh basil over the top, and cut it into wedges.

Floating Islands (caramel)

When I ask my husband what he’d like for dessert, floating islands have a strong likelihood of being mentioned. Floating islands are poached meringues floating in a sea of custard. The custard can be vanilla or caramel flavoured. We both prefer caramel, maybe because vanilla custard has so many other uses. The caramel version does take a bit longer to prepare though.

Floating Islands (caramel or vanilla)

Ingredients

  • 1 cup caster sugar
  • 3 eggs
  • 2 cups milk
  • 1 tbsp cornflour
  • (1 vanilla pod or 1 tsp vanilla essence for vanilla version)

Caramel (for caramel version only)

  1. Caramelize 3/4 cup sugar. To do this, melt the sugar slowly in a heavy bottomed pan. Don’t stir the sugar, but as it starts melting, tilt the pan gently to prevent the sugar from burning.
  2. When all the sugar has melted and is golden brown in colour, remove the pan from the heat. Very carefully, add 3 tblsp cold water (it will steam and spit), and then return to the heat and stir until the melted sugar and water have dissolved together. Set aside.

Islands

  1. Separate the eggs and set the yolks aside. Whisk the whites in a shallow bowl until stiff, and then gradually add the remaining 1/4 cup sugar while whisking.
  2. Heat the milk to just below boiling in a wide pan. Use a big spoon to drop egg-white islands onto the milk. Let them poach for 2 minutes or until they fluff up, turn them over, poach them on the other side for 2 minutes, and remove. Be careful not to cook them for too long, as they will stop being fluffy and become rubbery. As they poach you should see them fluff up, at that point they are ready to be turned. Leave them on some paper towel to drain.
  3. KEEP THE MILK!

Custard (Caramel)

  1. Strain the milk you used to poach the islands, and bring it back up to 2 cups by adding some extra milk. Heat gently in a saucepan with 3/4 of the caramelized sugar.
  2. Whisk together the 3 yolks and the cornflour.
  3. Pour some of the milk over the yolk mixture, stirring constantly, and then pour the milk and yolk mixture back into the pan with the rest of the milk.
  4. Continue stirring this over a low heat until it thickens and is smooth (if you remove the spoon and draw your finger over the back, it should leave a groove in the custard coating the spoon). Remove from the heat and strain into a serving bowl (or individual bowls).
  5. When the custard is cool, place some islands on top. Chill for 2 hours before serving.
  6. Just before serving, garnish the islands with some of the remaining caramel. You may need to gently reheat the caramel.

Custard (Vanilla)

  1. Strain the milk you used to poach the islands, and bring it back up to 2 cups by adding some extra milk. Heat gently in a saucepan. If you are using vanilla pods, split the pods, scrape out the seeds and add the seeds and pods to the milk.
  2. Whisk together the 3 yolks, the cornflour, and 1/2 cup sugar.
  3. Pour some of the milk over the yolk mixture, stirring constantly, and then pour the milk and yolk mixture back into the pan with the rest of the milk.
  4. Continue stirring this over a low heat until it thickens and is smooth (if you remove the spoon and draw your finger over the back, it should leave a groove in the custard coating the spoon). If you are using vanilla essence, flavour the custard now with 1 tsp vanilla essence. Remove from the heat and strain into a serving bowl (use a coarse sieve so the vanilla seeds do not get strained out).
  5. When the custard is cool, place some islands on top. Chill for 2 hours before serving.
Tip: Rinse the used vanilla pods, leave them to dry, and then place them in a jar of caster sugar to produce vanilla flavoured sugar.